Other than painting it all with a fresh coat of paint, my fireplace makeover is FINISHED! I’m THRILLED, okay more like GIDDY!, with how it turned out! I may or may not stare at it several times a day, pinching myself.

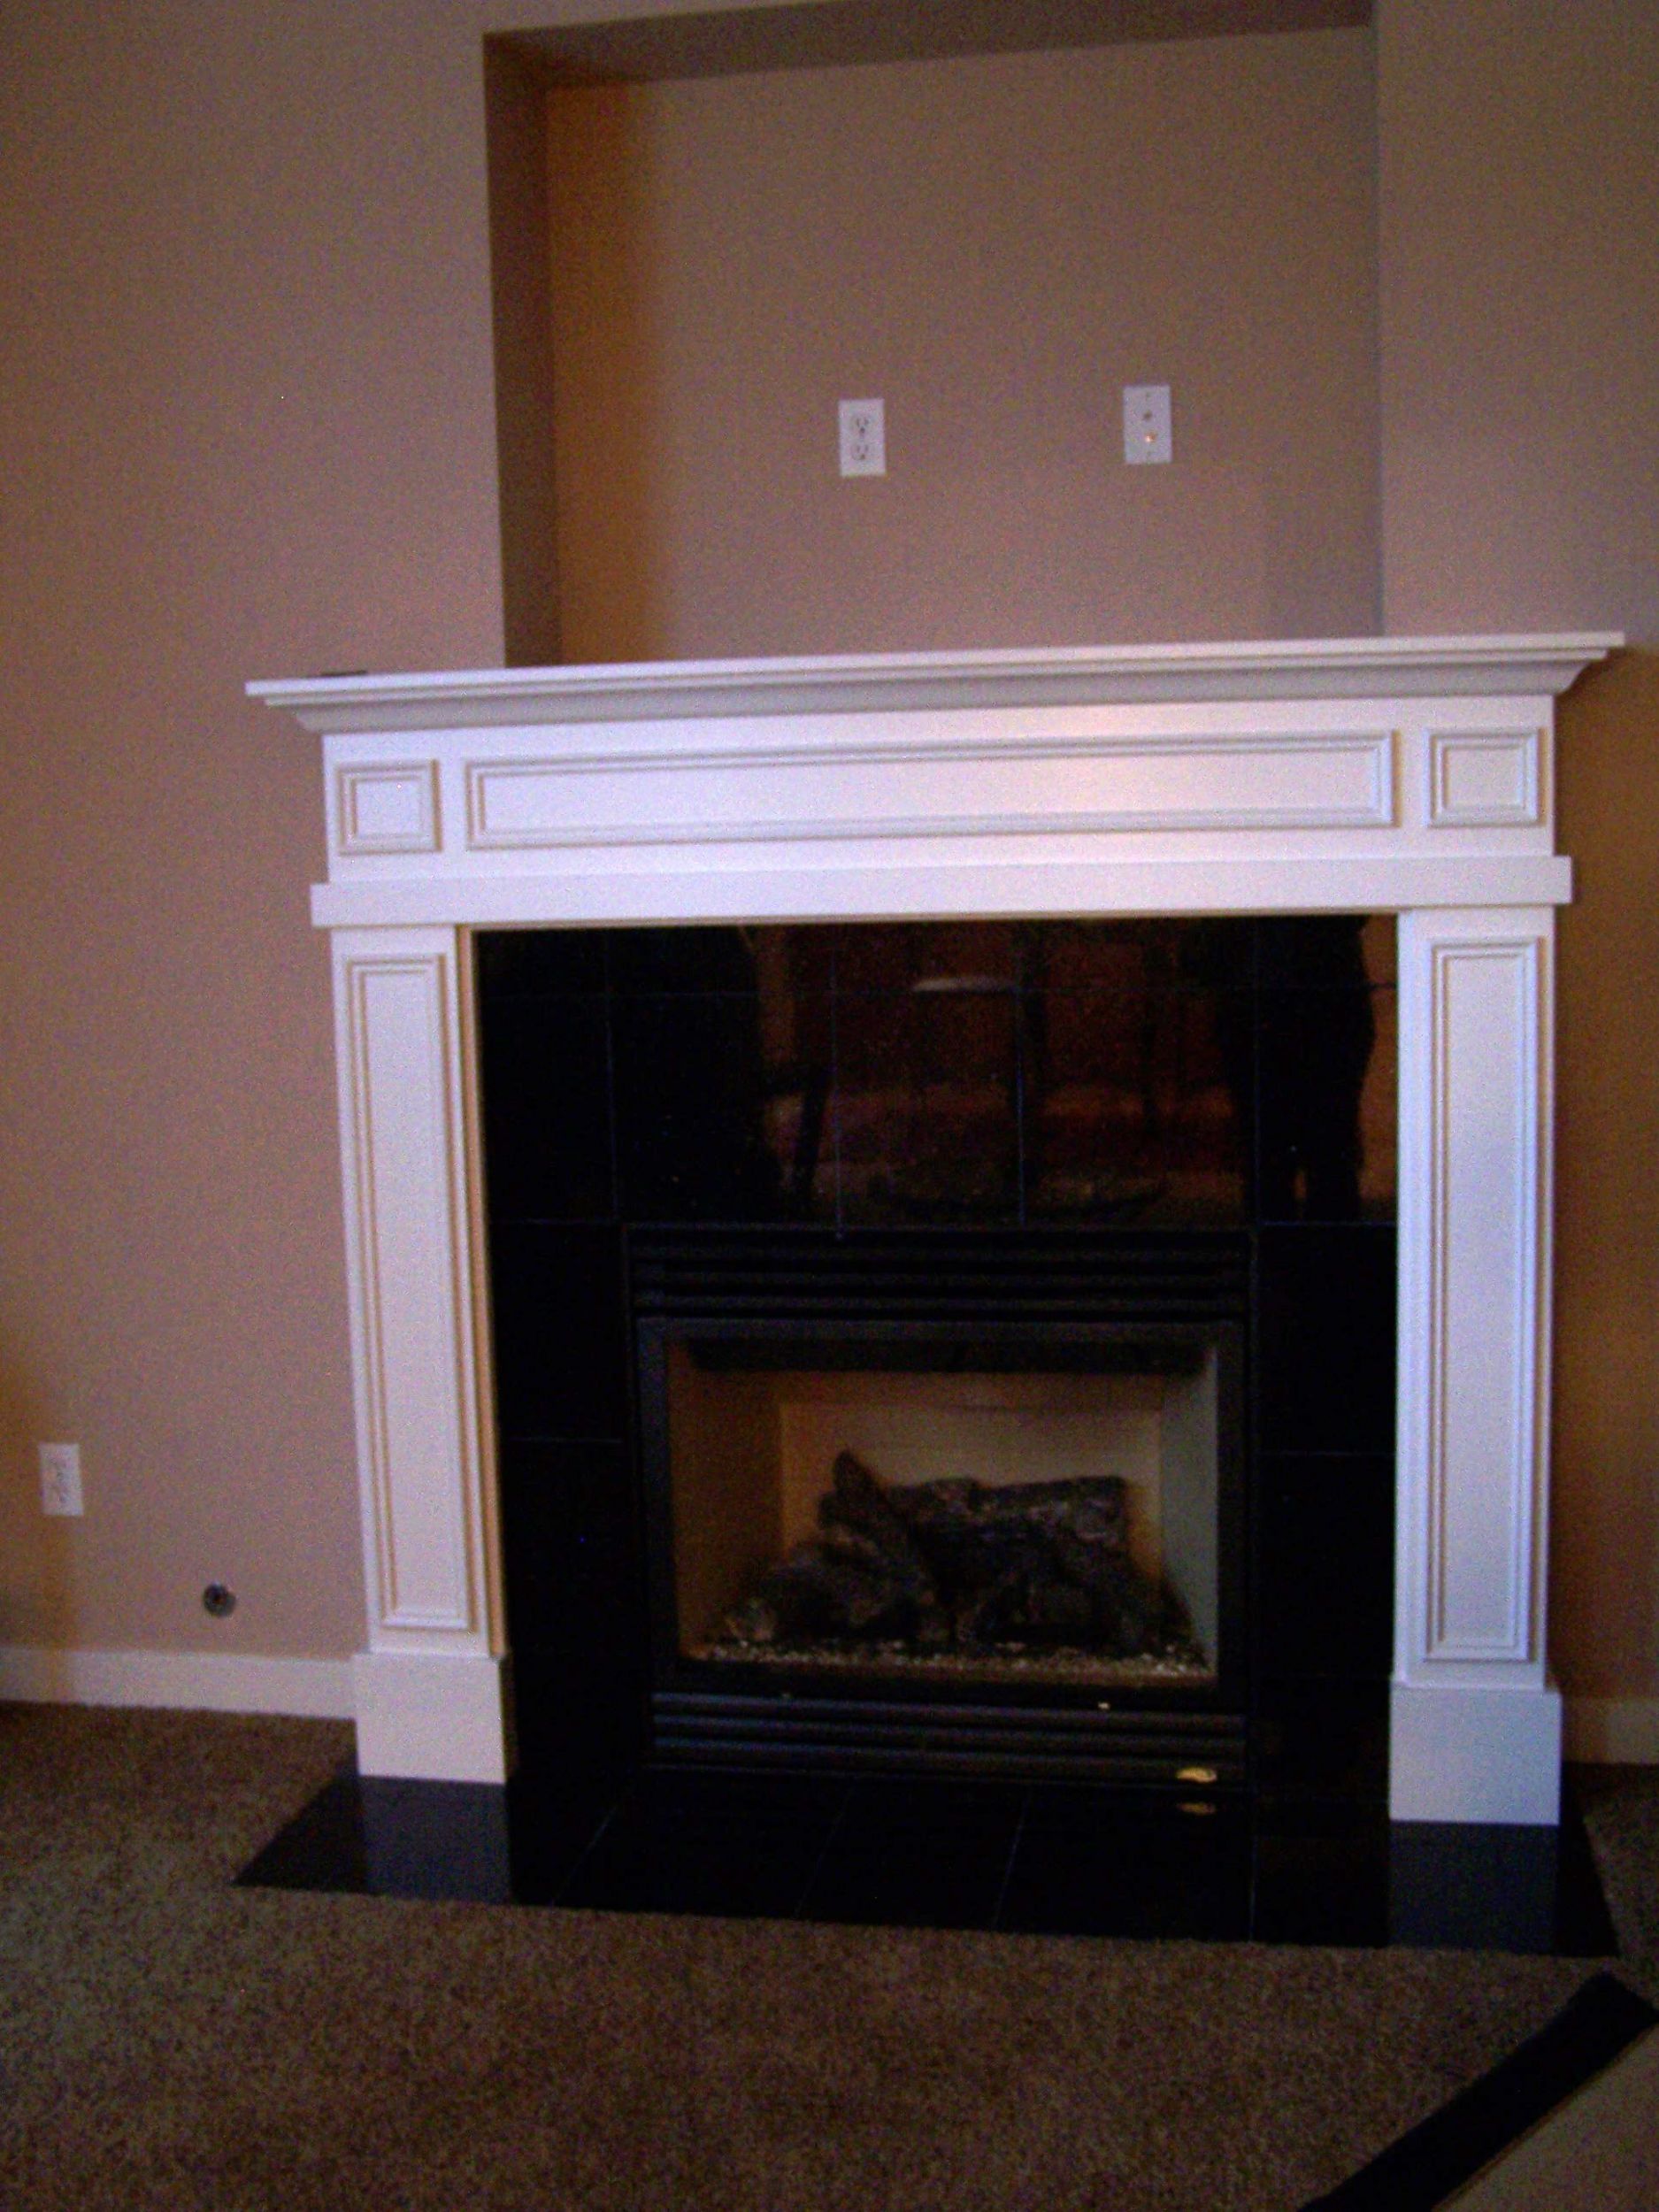
Our fireplace before was always a bit of an inconvenience and distraction. The giant unused fireplace hole always created a challenge. While I leaned shutters and mirrors and generally found ways to hide the hole, it really wasn’t ideal for us long term.
The black tile was so shiny and reflective and the gold glitter flecks on the black just gave me a “bachelor pad” vibe rather than the more cottage look I was after.
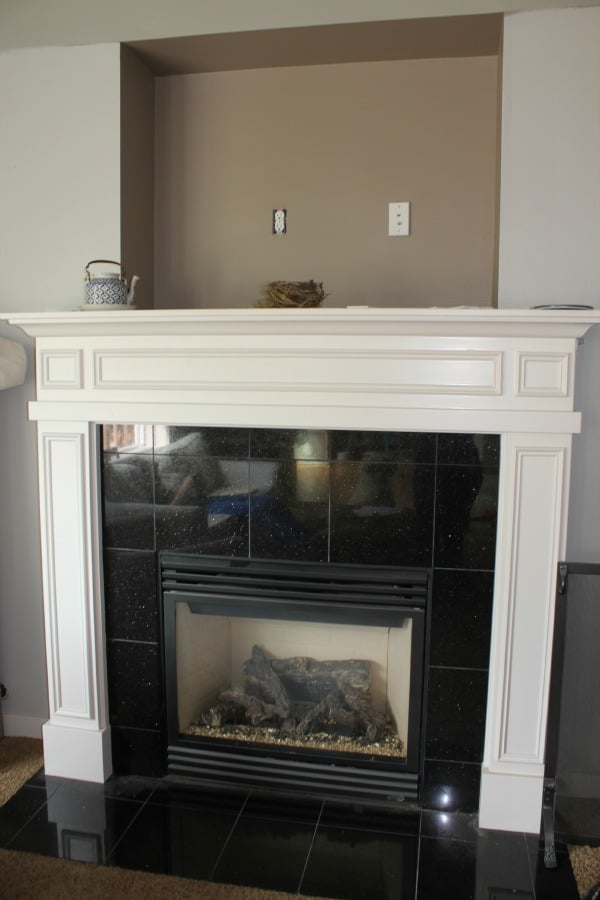
It looked like a big black galaxy in the middle of our fireplace, distracting everyone from the pretty mantel.

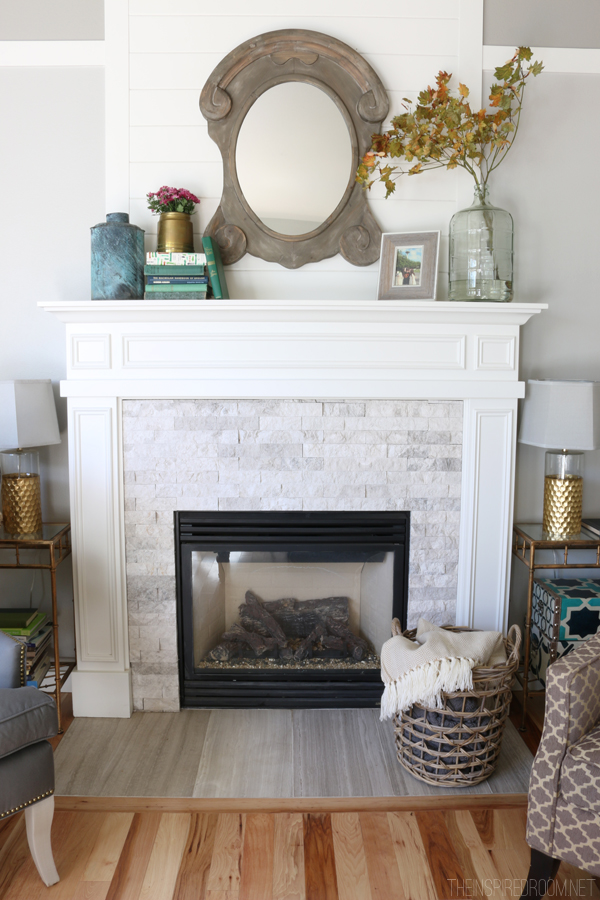
We used an inspiration picture found in this post to come up with a doable but more permanent fix to the giant hole. A simple wood frame built around horizontal white planks created a more interesting backdrop. It will even be prettier once it’s painted, right now it is just primed wood.

The simple molding and trim work in the room (which I will show more of soon!) adds a more cozy cottage vibe and better shows off the beautiful mantel we already had.

A lovely new split face gray and white stacked stone from DalTile (see sources, below) transformed the front of our fireplace. I think it looks amazing!

The black flecked tile and old stained carpet around the fireplace hearth needed to GO!

In came the honed vein-cut limestone tile for the hearth! Framed by our new Mohawk hickory wood flooring, the stone hearth now looks clean, finished and gorgeous! The kitchen/family room is coming together and the fireplace is now a beautiful focal point. You’ll see more of this room makeover in future posts!

Jack is pretty cozy, lounging by the fire on his new doggie bed!
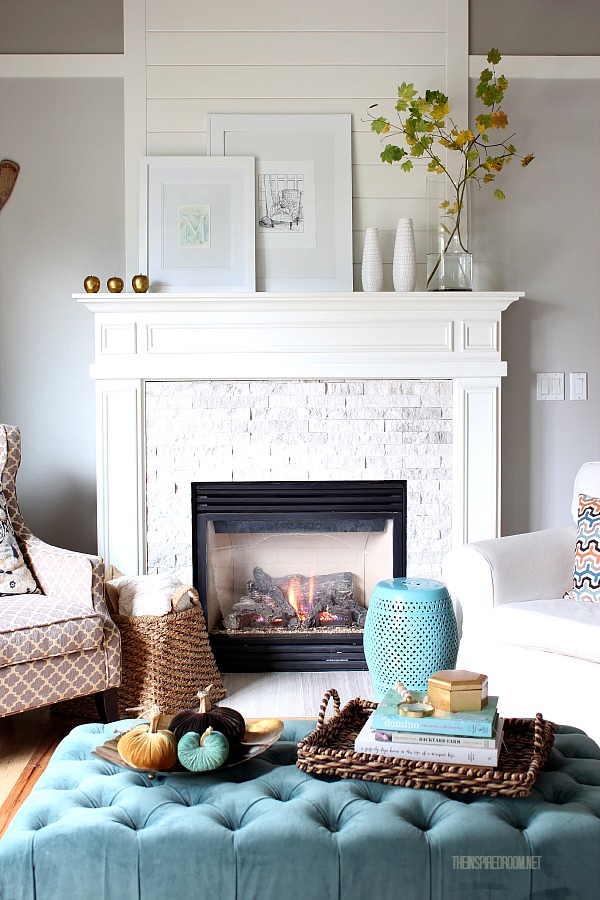
 Below is an updated peek at our mantel!
Sources:
The wood is tongue and groove beadboard planks (turned backwards).
Stacked split face stone on fireplace is from DalTile #L757 Arctic Gray 2 x 6″
Limestone hearth #L191 chenille white vein cut honed via DalTile
Our rug is an indoor/outdoor rug from Overstock.
Wood floors by Mohawk.
The mirror is from Restoration Hardware.
The Christmas canvas is from Red Letter Words.
The metal buckets on the mantel were from LuxeYard.
The basket is from World Market.
The pillow on the chair is from Target.
The chair is a rattan chair of unknown origins.
The topiary is from Holly Mathis Interiors.
The dog bed was from Joss & Main.
Jack the Goldendoodle is from a farm in Newberg, Oregon.
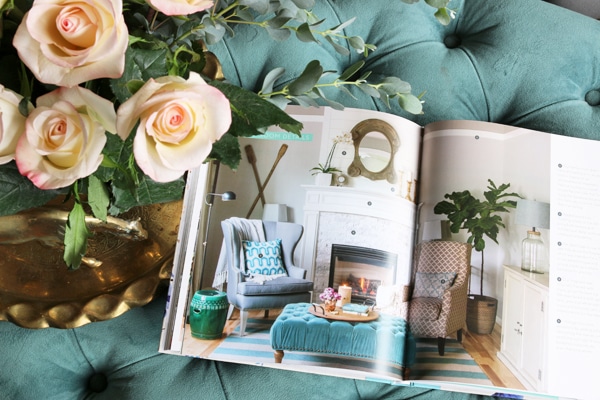
Find more decor inspiration in my book, The Inspired Room!
“Melissa Michaels’ new book, The Inspired Room, is full of smart, practical advice and packed with inspiration to spare. The photos are gorgeous and accompanied by helpful tips and details, and the writing lifts you up and makes you excited to dive into home decor headfirst!” — Sherry Petersik, NY Times Bestselling Author of Young House Love“
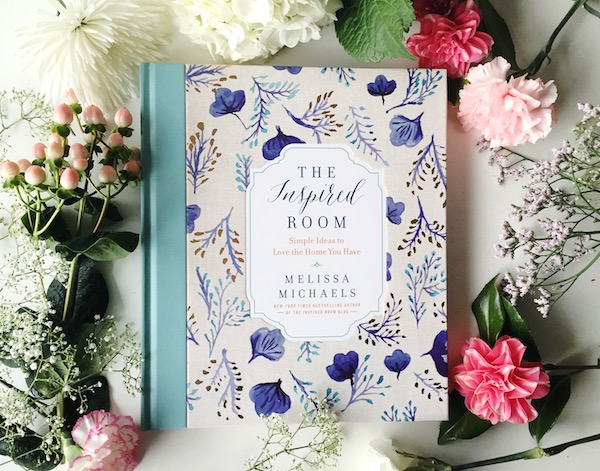
Your home isn’t a showplace—it’s a sanctuary. You’re invited to forget about the rules and discover inspired ways to personalize your spaces and express your style with texture, color, and your favorite treasures. Room by room, with full color photos, I’ll help you shape a home that is inspired by the people, beauty, and life you love.
Order The Inspired Room on Amazon!


I love the new look. I really love the stone you used around the fireplace. The hearth is nice too. I look forward to more posts about this room. :)
Thanks! ;-)
I love the stacked stone facade, so pretty and a great textural look. Jack adds just the right touch!! Kathysue
Thank you Kathysue, Jack always completes the look :-)
Love the rug! Love the new fireplace, what kind and brand of stone did you get for the surrounding fireplace area and the floor tiles? Those are exactly what I’m looking for!
OK, I added more detail to the sources at the bottom of the post! Hope that helps!
It’s so lovely Melissa! You’re indeed inspiring!
Thanks sweet lady!
Nice makeover. What a wonderful difference.
What a difference – I love the boards above the mantel and the soft gray stacked stone surround. It is the perfect time of year to get a fireplace makeover. Yay for mantel decorating!
What an amazing transformation! I love the stacked split stone and limestone hearth. Your plank wall is a great solution. Beautiful work!
Thank you, Roeshel! :-)
Whoa, hold on! HOW did you put the new tile on- right over the old? We have UGLY brown/black granite tiles on our fireplace and yes, bachelor pad vibes hits it on the head! I would love a fieldstone look. All that to say- beautiful!!!!!
Yes! New stacked tile on face went right over bachelor pad tile! My mantel was thick enough to accomodate the new tile. Hearth tile was removed first to make it flush with floor.
What did you use to adhere the new tile to the old granite tiles? I am about to do the same project and would love some insight. Thanks!
Melissa!!! It. Is. Stunning. Seriously, I love every drop of it. Beautiful, girl!!
Thank you Chris!!!
So much better!!! Good Job!
WOW! Beautiful Melissa!
This is really a fresh new look for you!
What a huge change!!! I can see why you are thrilled!!
Thank you Diane, I am pretty tickled over it. Can’t wait to show the whole entire kitchen/family room!! I am loving how it is turning out.
Oh my goodness what a beautiful makeover…Stunning really and with Jack there it looks like a shoot for a magazine…:)You are so very talented my dear…:)
Aw, THANKS! Jack loves to be in the pictures and I can’t go wrong with his fluffy face gracing the photo, right?
Beautiful remodel. I love the gray so much.
Thanks so much! :-)
Beautiful – love the new look!
I find myself wanting to pull a 21st century Mary Poppins and jump right into my phone so I can end up in your “new” home! You are convincing me that I like gray. A lot. So glad you are soaking up your new space!
Wow! That is beautiful.
i love it, melissa!
we’re hoping to do the same thing above our mantle…it’s a HUGE space, and it needs something to soften it up…planking it is the perfect idea!
Gosh, this looks amazing!!! What a transformation!! I have brick all the way to the ceiling on my fireplace (cathedral ceiling at that!) I wonder if planking over it would be a possibility?! Would definitely be a nice way to give more of a cottage feel to my space as well!! Oh dear, another great idea of yours to ponder!! Thanks for sharing!!
I just love, love, love this make-over!! …everything about it is gorgeous. Enjoy! : )
It looks fantastic! What a great makeover…
absolutely perfect! you must be on cloud 9!
One word – amazing!!! Really, one word isn’t enough. I would be going and looking at it all the time, too. (I do the same thing.)
The look you pursued back in the conceptualizing phase has been captured. That of cottage by the sea: the grays and blues with white, and the good contemporary designs, with spots of darks for anchoring and spots of loved things for joy and thankfulness, it’s restful, inviting, calming, and very lovely. Back-to-back meetings–oh my! I’m glad you have beauty to come home to, Melissa! Best Christmas wishes to you! P.S. I’ve found an old kitchen cupboard door, windowless, that is going to be painted antique white, the color of our wood molding, and placed on the “Christmas shelf.” The idea of the height and interest I expect it will add has been gleaned from your photos of your mantel, am quite eager to see the transformation at Christmas with our family treasures nearby!
Melissa, beautiful beautiful beautiful!! If Jack wasn’t in that first photo I would have thought it was your inspiration photo from a magazine! I love the tiles you chose and the planked wood is perfection! So pretty.
Fantastic makeover, really love the rug. What a transformation!
Love, love this fireplace. The sign is fantastic. The dog looks so contents.
Cynthia
What a transformation. Seriously. The detail in this fireplace project is incredible. That is what impresses me the most. How you took so many elements, put them together, and created a look that was effortless and seamless. It doesn’t look like it is trying too hard, and it could have easily slipped over into that category. Your before picture helps. It was so impressively bad. I think your careful planning made all the difference. Good example for us overeager decorators.
Wow, that is a wonderful compliment. Thank you so much!
Melissa, it’s gorgeous!! It looks so elegant…all bachelor pad days are gone! Excited to see the whole room! ;)
LOVE!!! You never cease to amaze with you wonderful details and selections!!!! :) I noted the new tile went over the old.. any prep tricks, especially since the old tile was polished? Wondering how I could make this work.. Does the new tile butt to the wood mantel? And is the edge at the fireplace insert cut tiles? Wondering how they finish the edges..? Love also the mix of tiles and wood finishes, complimentary and gorgeous.
THANK YOU!! :-)
I had a tile person do the tile for me and he said it was fine to go right over the top of the old tile. Otherwise we would have had to rip out face tile which would have meant basically taking off the entire mantel — a real pain. Just to be safe, he put a brace under all the stone overnight after the work was done so it would dry without slipping at all. The new stone goes right up to the wood of the mantel and around the fireplace insert, no caulking or grout or trim at all. You can see the edges around the fireplace insert so they are not finished but it is fine because they are stone so the rough edges fit right in to the look. I still need to paint the mantel so it will look even better once everything is all painted and pretty.
The hearth tile was removed in order for the new limestone tile to be set flush with the floor, as I didn’t want it to stick up at all.
The stone was apparently not easy to cut (it would break and crumble and he’d have to redo pieces) so that is just an FYI for any DIY’ers :-)
I’ve always loved the temporary fixes you’ve done above your mantel, but this is beautiful! And the stacked split face stone on the fireplace is beautiful. Great job, Melissa! Thanks for sharing your home–and your life–with us.
I am with other posters- any tips or tricks for the fireplace tile? I desperately need a redo, but I thought I’d have to rip out my tile to do it. It looks great!
Thanks, I just put a few notes on the tile installation in the comments under another question…hope it helps a little?!
Wow! That is a really beautiful transformation, one of the best I’ve seen. I love the colors, textures and products you used – very clever – you’ll be admiring it for years! ;-))
Thanks so much, Sarah!
Stunning!!!!! that limestone tile slays me.
It looks so soothing, Melissa! What a great transformation you did!
Wow — the after is amazing. It looks so custom and like it was made for your home. I love how the wood frames the hearth, too. A gorgeous detail that gives such an intentional look. I’m so happy for you!
just gorgeous. i love it!
What an amazing redo! I’ve been searching for this color rug but couldn’t tell the color on Overstock (may be my monitor!!!) would you mind sharing the color? Thanks!
In my house the color looks like a dark gray slate blue :-)
Beautifully done. I recently completed my own fireplace remodel that you can see on my blog and must say it makes such a difference, even more than I expected. Thanks for the inspiration
Amazing and lovely! I love the stacked limestone! I have been eying the same stuff for a while. However, I do not think it will go well with where I wish to place it. :(
I know you sit and stare at your fireplace now. I would. ;) Wonderful and beautiful transformation. I can very much appreciate all the hard work that went in to it. My husband and I did a fireplace makeover last month and were pleased with the results.
By the way, you have a very beautiful home. :)
Julie
Love it Melissa! You are so full of inspiration for your readers. Jack just rounds out the reveal so nicely. Love his chevron bed. He’s so stylish! (:
xo, Faith
Hi Melissa, love that you included the before photo because it demonstrates even more how major the transformation is. Lovely! Your picture looks like it’s straight out of a magazine. Beautiful light and styling.
The room colors are so soothing and coordinated too. I like the area rug and never considered Overstock. Thanks for including a source list. I’ve heard of that site before, now I’ll have to investigate it futher.
Jack is adorable too and doing his part as the room’s cutest accessory.
Happy holidays,
Lisa
It is absolutely beautiful! You did a fabulous job!
Clever way to cover the TV hole! Love it. perfect little picture…now if you could get jack just to sit there all day….because, why, its so cute.
Happy day
LOVE that split face tile!!! Just gorgeous!
So pretty Melissa! I love how you added the board on the top. The blue rug and pillow coordinates are beautiful!
Melissa, Your fireplace looks wonderful! Great makeover! Can’t wait to see your kitchen :+)
Blessings in this Holy Season to your family from ours!
Michelle
Wow, what a transformation! Looks beautiful!
Looks amazing. What a transformation! Also love the Christmas decor. Where did you get the Joy to the World art? Did you make it? I didn’t see it listed in the sources.
Thanks so much! Yes, I think it’s there. I called it a Christmas canvas, I believe, but it is from Red Letter Words (redletterwords.com). I adore it!
Beautiful!!
Just a quick question: the chenile veined tile looks gray in your photo but more creamy on the Daltile website. How does it look “in person”?
It is gray in real life!
Thank you – the whole new fireplace design is gorgeous!
Can you tell me where your throw in the basket came from?
Yes, the pom pom throw was from Pier One!
Your fireplace is awesome and I love the simple decor. Wish I had a chevron bed! Ha! Jack is one lucky pup! He is adorable.
LOVE the color on the walls…can you tell me the name of it?
Yes, the walls are Glidden Polished Gray. :-) Thanks!!
Is there a way to actually print the pics as photos? I only seem to be able to copy the webpage …. would love to put it in my ‘fireplace inspirations’ and I cannot get it to print as a pic. Any ideas? LOVE LOVE LOVE the design!
If you’re on Pinterest, you can pin things to your inspiration boards and then save them to your desktop from there, or if not…try taking a screenshot from the blog itself! Hope that helps :)
Where did you buy or purchase the Daltile from? Did you purchase it online or go into a store and buy it! I so want to do this!
We are currently freshening up our living room and fireplace, and love what you have done to yours! I will make sure to take a pic of the new redo featuring our Goldendoodle Kramer!
Hi Melissa, I have been following your blog for sometime now. We are in the process of building a new home. We are entering our retirement years and my overall mantra is ‘low maintenance’ and ‘handicap accessible’ as well as timeless. I LOVE your fireplace, and certainly feel it is timeless. But I do wonder if the white brick requires any special cleaning to keep it looking like new. I’d love to hear from you on this. Thanks for your ‘Inspiring Room’ as it has certainly been my inspiration! Gloria Weller
Hi Gloria! Our fireplace hasn’t needed any cleaning at all. We have a gas fireplace, so that might help keep it cleaner, I’m not sure. But it’s been wonderful! Thanks, good luck with your new home! Enjoy!
Okay I have to know where you got that mirror! It is darling!
Thank you! :) It’s a salvaged wood mirror from Restoration Hardware!
Love!! How did you attach the boards above the fireplace mantle? Nails, wood glue? I don’t have the large cut out but am planning to do a refresh on my fireplace like this and am wondering if I need to consider the wall behind the fireplace before nailing anything in?? Also, is the wood frame around the planks the same type of beadboard turned backwards and vertical, or did you use something different?
HI
Gorgeous job..I have black tile too ..did you use a special grout as it was around the fireplace thxs
Hello Melissa,
Big fan of your style and your pup! I love the stone. Was there a reason you used a different material for the hearth? Just curious :)
Thank You,
JoLynn
Thank you, JoLynn! Yes, the other stone was very rough so we wanted a smooth texture for the hearth. That way it could be stepped on and accessorized as desired!
Love the whole look. I must know, were you able to apply the stack stone right over the black marble?
Yes, we didn’t remove the black tile at all, just went right over the top!
Hoping to do this same project soon- shiplap over the TV niche. Did you have to drywall or just frame the niche and place shiplap on top?
It’s gorg and obviously timeless.
Just placed the shiplap over the existing drywall!
Did you take the tile off or did you just cover it with the stacked stone??