This Post May Contain Affiliate Links. Please Read Our Disclosure Policy here
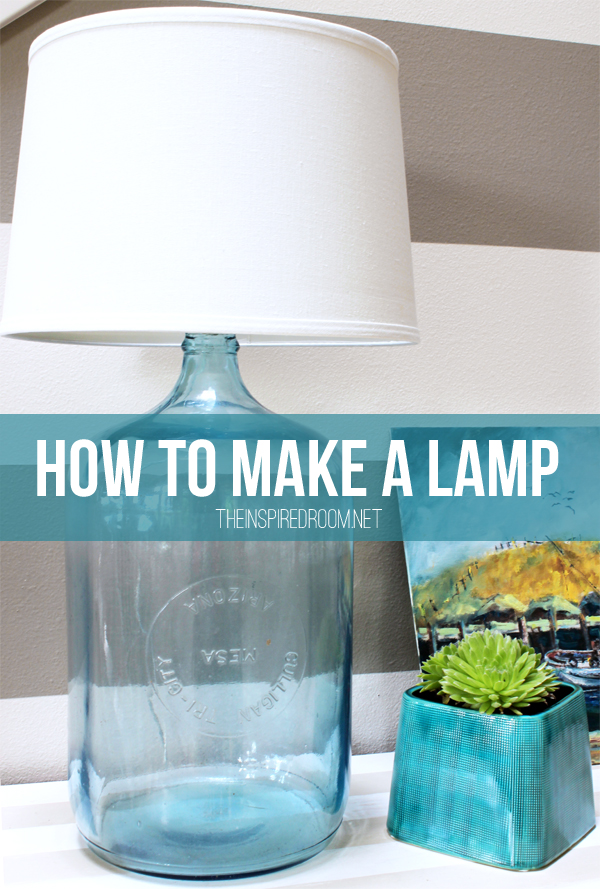
How to Make a Lamp
All the instructions and sources for how to make a lamp are simplified at the end of this post if you want to skip to it, but I’ll go through step by step first with more details.
So, like I mentioned yesterday, I made a lamp. Never thought those words would come out of my mouth (nor did you, I’m sure HAHAH!) but sometimes you do things because you know exactly what you want and you can’t find it anywhere. And when you do find something similar, it costs a million dollars. And you don’t have a million dollars. Or you have to wait weeks to order something and you want it RIGHT NOW. I’m SO impatient. Usually I can compromise and find something else that would work, but this time, I knew what I wanted and I wasn’t going to settle.
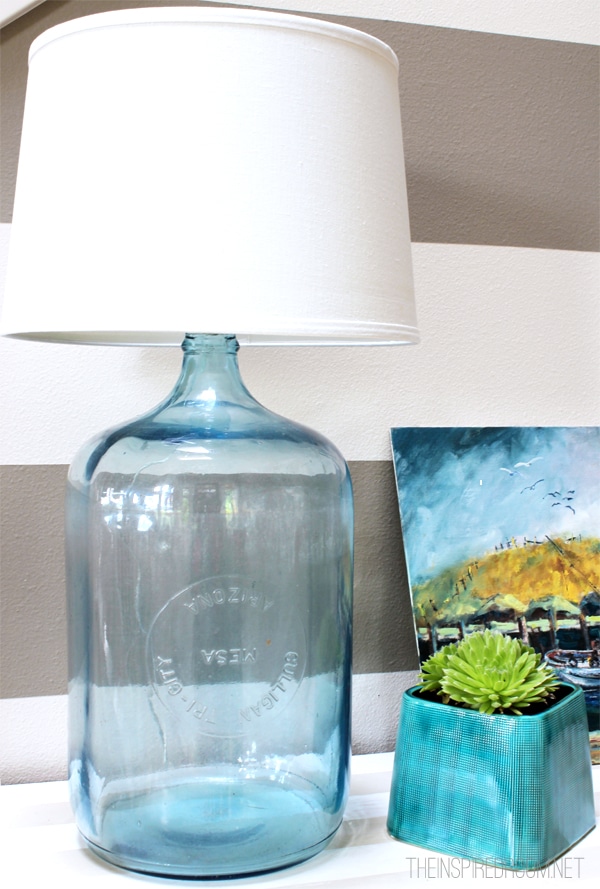
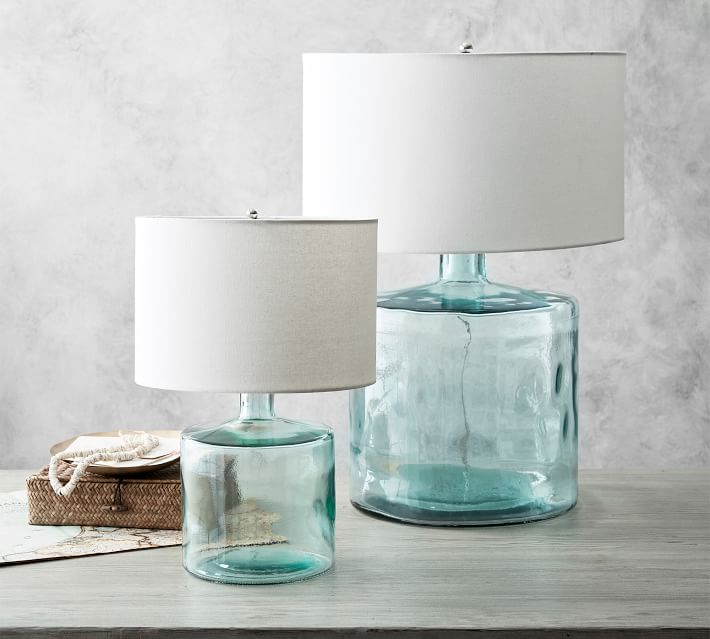
I wanted a BIG GLASS LAMP, and I found just what I was looking for at a local flea market. I found a big beautiful blue glass water jug! (Find similar glass water jugs here!), or a pre-made similar blue glass lamp HERE.
Basically you could make an lamp from just about anything. That’s great news for those of us who love unique lamps and lighting with character but don’t always like the price tags. I also love BIG lamps (well, and tiny ones) but they are not that easy to find at an affordable price.
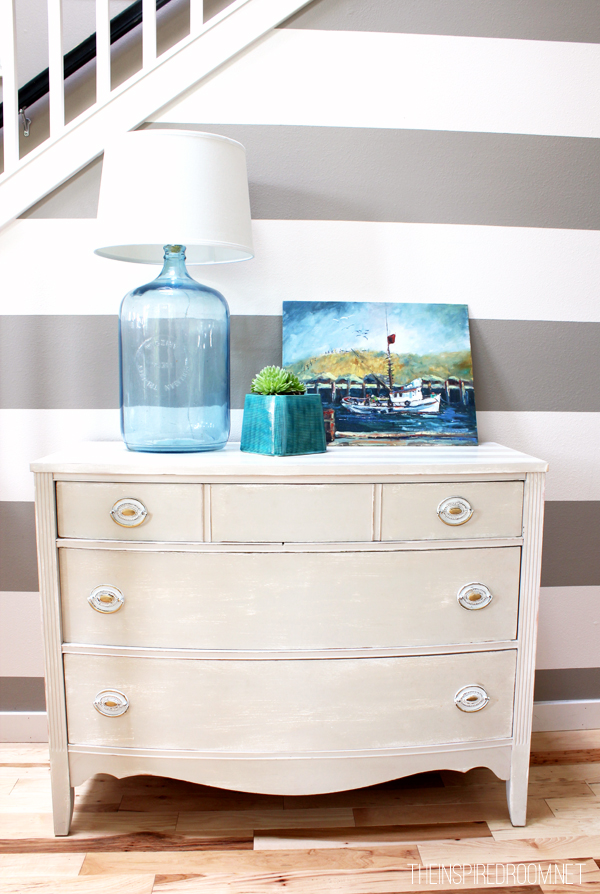
My lamp is obviously the size of a water jug. Have you ever noticed when you take pictures of things in your house that accessories and items often appear smaller than they really are? Or sometimes they appear larger, it all depends.
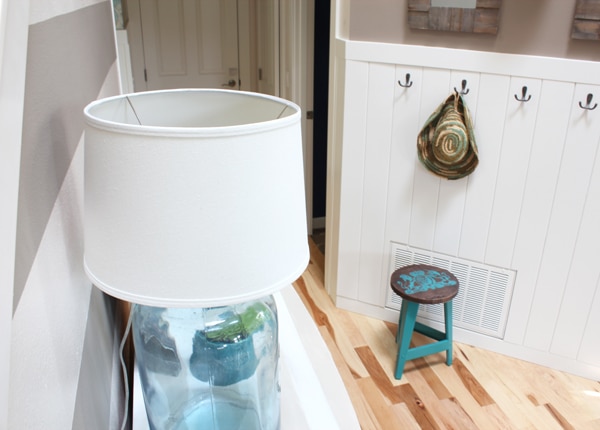
But in real life, the scale of this lamp was a big deal to me because of the high ceilings in the entry. I didn’t want a tiny lamp on this table. I like big lamps, I cannot lie. In fact, truth be told, I’d rather have a few bolder accessories than a thousand little things teetering on a table or mantel. But that’s just me. Less is more.
Because my lamp started out its life as a glass water jug, notice how the words are upside down since they are designed to be used with the spout down. That is part of the character of the lamp, right? Right.
This lamp was VERY easy to make. So easy in fact I wondered why I had never tried to make a lamp before and my wheels started spinning with all sorts of DIY lamp ideas. I didn’t really find a tutorial I used for this I just made it up myself according to what I thought would work with this jug, although I know many people have made bottle lamps and might have their own way of doing it.
And of course, every jar or vessel you use for a lamp will be different so you will have to assess your own particular container to decide what would work best.
I will give a disclaimer — I’m not a skilled DIY’er nor am I an electrician. Anything I say should be confirmed with professionals as I am not responsible for any DIY mishaps you might have in attempting this at home. Proceed at your own risk.
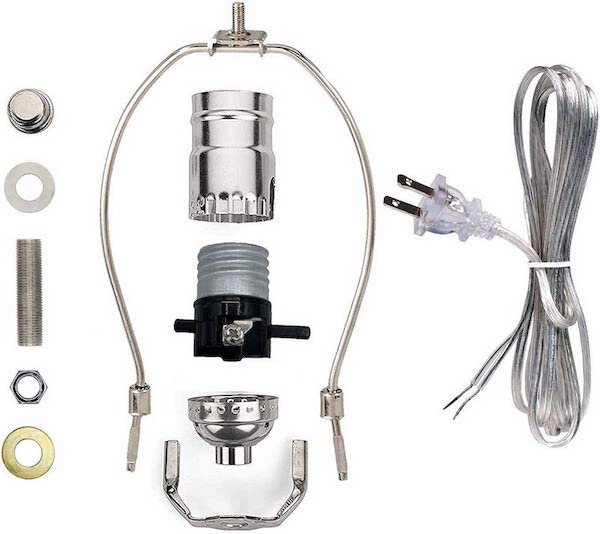
If you look at a lamp you already have, basically all a lamp is the container, a socket and a cord. Sometimes there are stems or lampshades too. “I should be able to handle that,” I thought to myself! So armed with my vast un-tested knowledge of lamp making, I headed off to find a socket and a cord that would work for this jug!
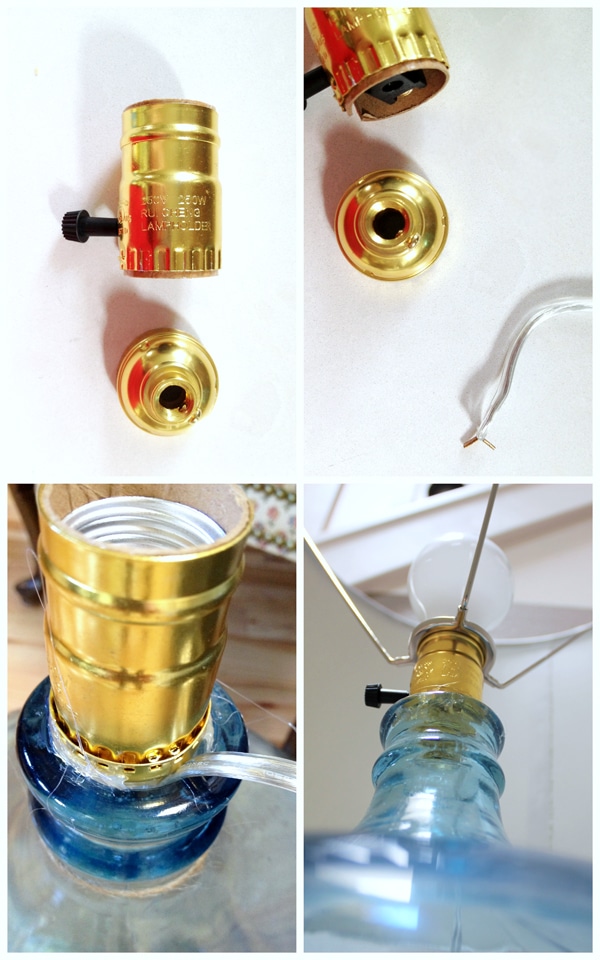
There are actual lamp kits (like THIS) that come with corks to hold the socket in place specifically for making a lamp from a bottle, or you can buy a set that has the cord and socket attached and ready to go (easy peasy), or you can do what I did which was to buy individual lamp sockets and lamp cords. The reason I went with the individual pieces was because I wanted a clear cord. And, I didn’t need the cork because the spout on the bottle and the socket were so close in size and I wasn’t going to use any stem or harp that needed stabilization.
Because I’m not an electrician and have no qualifications, I won’t tell you exactly how to attach the wires from the cord to the socket in case my misinformation causes you permanent injury or death. Nobody’s got time for that.
You can google it or better yet, ask someone at the hardware store or an electrician. My husband happened to know how, so we did it ourselves. It was easy and no one died. High fives all around for that.
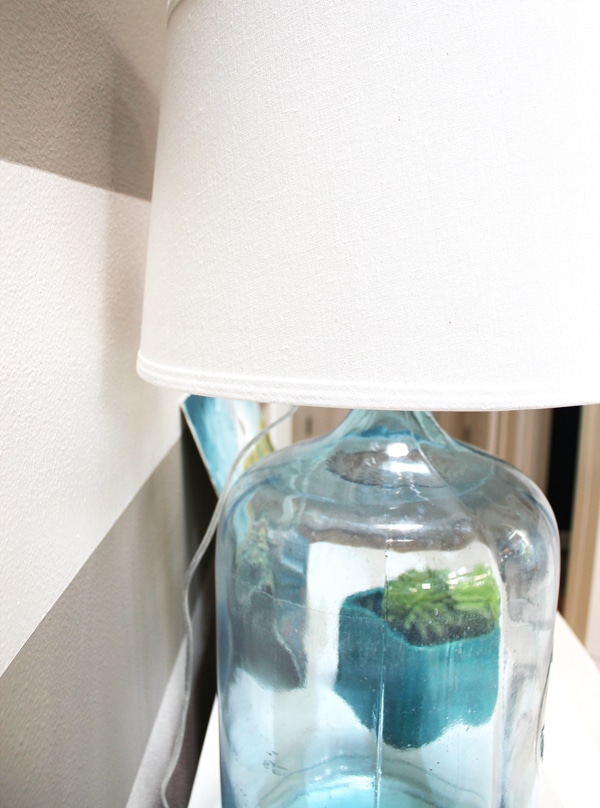
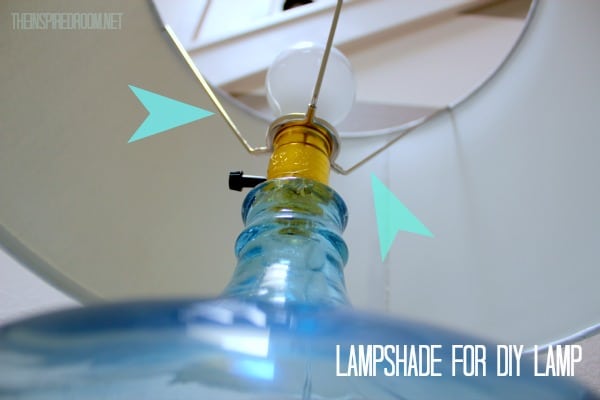
Once the socket and cord were connected, I just stuck the socket into the spout of the jug, with the cord sticking out and put a little hot glue around the metal to adhere it to the glass. Easy peasy. Maybe there is a better adhesive so you can research that, but the hot glue gun worked fine for me. So far, so good!
If you want the cord to go inside the glass, you would need a special drill bit to cut glass so the cord would go out the side near the bottom or even through the bottom if you wanted to cut the bottom out. But in this case, I didn’t care that it was outside the jug. Because the cord is clear and the lamp is against a wall, it isn’t that conspicuous from most angles.
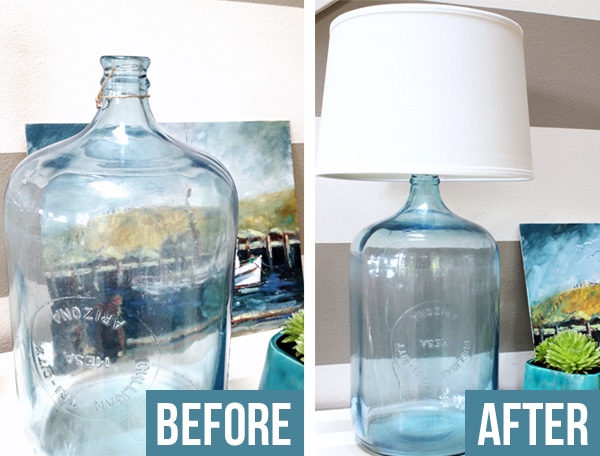
If you are looking at the lamp from the side, this is what you would see (photo above and below). If that would bug you, you might want to try cutting the glass and making the cord go inside and out the bottom. But either way, with glass, you see a cord or stem or something in the glass.
I actually thought seeing the cord dangle out the back like this would bother me but it really doesn’t at all since it is a clear cord. I guess I don’t really look at it from the side anyway, and it is a glass water jug lamp so it just adds to the funky unexpected nature of the lamp. No biggie to me.
For my lamp shade, since I didn’t use a harp to attach it, I found that the ring style lampshades they sell at Target worked great. You can see what it looks like from under the shade, it just sets right down over the spout of the jug. You could use a little sticky tack if it wobbles or if you use a different sized jug you may need a washer or may need to use a harp (think that through before you start, because I think you’ll want to put the cord through the harp before you attach it to the socket.).
PHEW. So many words for such an easy DIY. But for those of you (like my husband) that say “Just simplify this for me, get to the point — what do I need to know?” haha, I will simplify it into easy bite-sized steps…
To recap HOW TO MAKE A LAMP (modify as needed for your vessel):
1. PIN the above photo from this post so you can refer to it later and help spread the news that The Inspired Room MADE A LAMP! That is kind of a big deal. Heheh. 2. Find a glass water jug. I got mine at a flea market. 3. Buy the lamp socket and cord at a hardware store or reuse one you already have. 4. If your cord is not attached to the socket, attach the wires (consult an electrician if you do not know how to do this). 5. Set socket in spout of jug, pull cord to the side to it comes out of the spout. 6. Use a hot glue gun or other adhesive to stabilize the socket in the jug. 7. Set a wire ring style lampshade on the socket. 8. Plug it in and pat yourself on the back because you made yourself a cool LAMP!
If you make one, let me know! We can have a lamp party! Are you in?
You can find similar glass jugs or pre-made glass jar lamps HERE.
Update in 2021:
Looking for a similar blue glass lamp that you don’t have to DIY? Here is one that I have and LOVE!
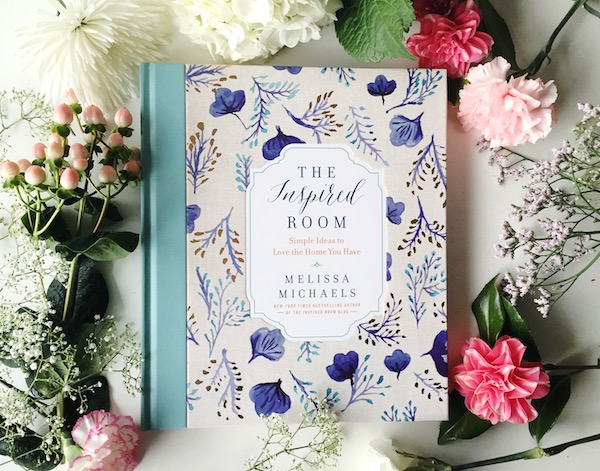
Grab your copy of my book, The Inspired Room on Amazon!
Your home isn’t a showplace—it’s a sanctuary. You’re invited to forget about the rules and discover inspired ways to personalize your spaces and express your style with texture, color, and your favorite treasures. Room by room, I’ll help you shape a home that is inspired by the people, beauty, and life you love.
“Melissa Michaels’ new book, The Inspired Room, is full of smart, practical advice and packed with inspiration to spare. The photos are gorgeous and accompanied by helpful tips and details, and the writing lifts you up and makes you excited to dive into home decor headfirst!” — Sherry Petersik, NY Times Bestselling Author of Young House Love
You make it look so easy. I think it turned out great. I was curious how you did it…I have a couple candle holders I want to turn into lamps…now maybe I’ll be able to figure it out.
LOVE your lamp!! I’m like you… lamps need to be unique, and sadly you can’t find that at WalMart for $9.97 or less. :) I think I may copy you because my living room needs BIG lamps , and besides, my shiny brass ones I’ve had since the 90s are just a tad outdated….
Well done and lovely! I rewire lamps I get at thrift stores all the time with the kits from Lowe’s. Or even our own lamps that might be a one-way socket that would be better as a 3-way socket. Great sense of accomplishment and safety.
I was wondering if you were going to post a DIY on that lamp! The color is so beautiful and you make it look so easy; I feel like I can actually do that!
Love that bottle – and the simple white shade :-)
I find it difficult to find shades that do not cost a fortune and I do know that some people make their own, but I am NOT a DIY person! – but I have green thumbs :-)
Thank you! For years I have wanted to make lamps – but was afraid I would fail and cause a fire! I think I can do this! Wow! I need a lamp for my desk- soooo I was thinking I might attach fabric around base of bottle then make the lamp…what do you think? See how you inspire me?!?
What a beautiful lamp! The color of the water jug is gorgeous! I have lamps made with canning jars (you can buy sockets with the jar lid already attached!) as well as lamps made with baskets – the cords hang behind the jars/baskets and they are fine. Everyone notices the lamp, not the cord. :)
Love it!! And I love that the cord is not inside…not a fan of that either….the bottle is too pretty for that. Great job Melissa! The whole vignette is lovely…color…tones…and relaxing, too.
And I love that your DIY tutorial is brief. Unlike the one I just posted for a simple pleated collar for my Mason Jar. Arrrrghhh! And it took me like 7 hours from start to finish. [insanity!] :) Did I say I strongly dislike writing tutorials? Too bad we can’t say never again…especially as I have another one on the schedule. I put it off so long that it’s from last 4th of July. I wonder if it will get done. Guess we’ll both have to watch and see. Haha!! Maybe I’ll just come to your house and hang out in your entry, instead. [wink]
karen on bainbridge island
on June 27, 2013 at 3:09 pm
Most lamps in Europe have the cord coming out the top, rather than thru the vessel…very chic. It turned out wonderful. I just love the slight blue tint on the bottle you found.
I’ve made lots of lamps in my day. My favorites are from wine bottles that have sentimental value. The first one I made was from an oversized bottle of zinfandel that I purchased for Thanksgiving over 15 years ago. The wine was OK, but the lamp still sits in the guest room of our Thanksgiving dinner hosts. I see it every time I visit.
How awesome! I love that you didn’t even need to run the wire down through the lamp body and out through a hole cut with special glass cutting cutters. I just used this same exact lampshade from Target to get a match to an existing burlap shade. It’s my latest post and looks like the comment bot is linking it below :) You did a better job than me at simplifying directions!
Way to go! I love this idea and yours turned out amazing! I’ve been wanting to create my own lamp with a shade made of stained paint sticks, so this tutorial is perfect! Thanks for sharing!
What a great idea!! I have one outside in the garden just begging for me to do something with it..(other that hold a motion sensor light)! Now to figure out how to get it sparkly clean…ugh. but that would be the hardest part of this project. Great tutorial! Thanks for the inspiration!
*hugs*deb
That is an awesome water jug!! They ARE hard to find, but so worth it! And I love that you turned into a lamp, a useful item. I have a large vintage european water or wine jar and now I know what to do with it! Thank you! I’m quite addicted to unique glass jars or old mason jars ;).
Also, I LOVE that piece of artwork sitting on the table next to it. Is it an original or is it something I could buy a print of? Thanks so much for the lamp info!
The lamp is gorgeous! I agree that its better to have a few large bold pieces rather than a lot of small things that look like clutter. I have an old green glass soda bottle that I plan on turning into a lamp or candle holder. I’m sure it will not compare to this lamp however you definitely inspired me to do some large lamps next. Cool idea, thank you!
i have some bottles i am planning on turning into lamps and i was interested to see that you have jammed the cable into the neck of the bottle to get it into the fitting. my intention had been to get a glass bit for my drill and make a hole to run the cable inside the bottle but as i am also intending to fill the bottles with glass beads and/or coloured sand i am a little unsure about the possibility of heat build-up due to the cable having the filling packed around it. maybe it’ll be easier to have the cable on the outside of the bottle, especially since it would be obscured by the filling in any case. but have you tried any bottle lamps with the cable inside and filled? or do you know whether i have reason to be concerned about the heat risk or not? any knowledge or experience you have on this subject would be of value. thanks.
“It was easy and no one died.” LOL I didn’t realize it was so easy. I think these could be great gift ideas, especially some boozy bottles for those with man caves n’ such.
Thanks for showing us how it’s done.
xo
I inherited a few antique hurricane lamps from my grandparents. I am thinking of converting them into electric lamps….but without compromising the lamps. This looks like a great way to do it. I am looking forward to this project.
I pinned this when you first posted it and today, two years later, I finally did it! So happy with my new bottle lamp, thanks so much for the idea + instructions!! :)
I to want to have a unique lamp that no one Else has, so I have also been looking, very impatient person, I want Instant gradufaction as well, so in looking in all my kitchen cabinets, I came across an Old Wavy Glass Cookie jar that is OlD but heavy and very unique, So I took it to my Local Glass cutting shop and asked if they could drill a Dime size hole in back of Glass at bottom THEY SAID YES, but if it cracks it is not their fault . Have to take in consideration that it could happen, SO I said YES agree, so excited to get glass back to make my own Lamp from, Look forward to showing everyone soon *
This lamp is amazing! I am absolutely smitten with it! I have seen the big glass lamps before (for LOTS more than my budget can afford! HA!) But I have never seen a BLUE one! I think I have lamp envy now! I am going to have to look into this because I think I have caught the blue-jug-lamp-bug now and I don’t think I can shake it out of my head!!! Awesome idea! Pinning and will also pin to other boards :)
~Morgan (mypeartreehome.com)
Hoping you can help. Inspired by your post, I was hoping to make a DIY lamp too. I have a very similar water jug to yours, only mine is clear. I lugged it to a mom-and-pop hardware store and a Home Depot today, and the readymade kits in both places had those rubber pieces that were just too small for the mouth of my jug. They would have fallen straight through. The mom-and-pop shop’s owner tried a few creative solutions but couldn’t find anything to fit the mouth exactly. Did you have this problem? If not, any suggestions on how to figure it out? Thanks!


I like that! Might have to ry and make me a lamp. Adding on my I want list… big bottle :-) You make it sound easy.
Hugs, Gee
I am LOVING this lamp … maybe filled with seaglass?
YES!!
You make it look so easy. I think it turned out great. I was curious how you did it…I have a couple candle holders I want to turn into lamps…now maybe I’ll be able to figure it out.
LOVE your lamp!! I’m like you… lamps need to be unique, and sadly you can’t find that at WalMart for $9.97 or less. :) I think I may copy you because my living room needs BIG lamps , and besides, my shiny brass ones I’ve had since the 90s are just a tad outdated….
WOW!!! I love this :) It looks fantastic!
Well done and lovely! I rewire lamps I get at thrift stores all the time with the kits from Lowe’s. Or even our own lamps that might be a one-way socket that would be better as a 3-way socket. Great sense of accomplishment and safety.
You make it look so easy! Well done.
Which flea market/where did you make your find at???
It’s called Flea Market Chics!
Hi. Lovely bottle. Lovely lamp.
Please find my link for my lamp tutorial.
Yes, Im in for the lamp party :-)
I was wondering if you were going to post a DIY on that lamp! The color is so beautiful and you make it look so easy; I feel like I can actually do that!
Love that bottle – and the simple white shade :-)
I find it difficult to find shades that do not cost a fortune and I do know that some people make their own, but I am NOT a DIY person! – but I have green thumbs :-)
Love it, yes I am pinning and I’d love to make one :)! Let me know when the lamp party is!
Debbie
Now I want to make a lamp! Great job. It has so much character.
Thank you! For years I have wanted to make lamps – but was afraid I would fail and cause a fire! I think I can do this! Wow! I need a lamp for my desk- soooo I was thinking I might attach fabric around base of bottle then make the lamp…what do you think? See how you inspire me?!?
What a beautiful lamp! The color of the water jug is gorgeous! I have lamps made with canning jars (you can buy sockets with the jar lid already attached!) as well as lamps made with baskets – the cords hang behind the jars/baskets and they are fine. Everyone notices the lamp, not the cord. :)
I am soooo on my way to Lowes! Love the glass jug.
Awesome times 10! Pinning this =) I love the blue color too!
Love it!! And I love that the cord is not inside…not a fan of that either….the bottle is too pretty for that. Great job Melissa! The whole vignette is lovely…color…tones…and relaxing, too.
And I love that your DIY tutorial is brief. Unlike the one I just posted for a simple pleated collar for my Mason Jar. Arrrrghhh! And it took me like 7 hours from start to finish. [insanity!] :) Did I say I strongly dislike writing tutorials? Too bad we can’t say never again…especially as I have another one on the schedule. I put it off so long that it’s from last 4th of July. I wonder if it will get done. Guess we’ll both have to watch and see. Haha!! Maybe I’ll just come to your house and hang out in your entry, instead. [wink]
This is so pretty! Thanks for the tutorial. Patti@OldThingsNew
Fantastic! I honestly thought this was going to be so much harder! Time to get to work on my wine jug! It’s HUGE!
Love this! I was so curious on how you made it. You did a wonderful job explaining, thank you!
Bekah,
On behalf of –
A Moment with MOM
As I told you yesterday I am truly loving this lamp. I would love to find a bottle like this to make one big time!
Cynthia
Melissa,
I have 2 big glass bottles, one is bigger than the other. How big is your bottle?
Not only did I learn how to make a pretty lamp, I learned that there is such a thing as a clear lamp cord! Who knew??
Thanks for the instructions. I really love your lamp and I bet it makes you smile every time you walk by it.
Most lamps in Europe have the cord coming out the top, rather than thru the vessel…very chic. It turned out wonderful. I just love the slight blue tint on the bottle you found.
I’ve made lots of lamps in my day. My favorites are from wine bottles that have sentimental value. The first one I made was from an oversized bottle of zinfandel that I purchased for Thanksgiving over 15 years ago. The wine was OK, but the lamp still sits in the guest room of our Thanksgiving dinner hosts. I see it every time I visit.
Oh, well, there you go! I knew I loved European style! :-)
How awesome! I love that you didn’t even need to run the wire down through the lamp body and out through a hole cut with special glass cutting cutters. I just used this same exact lampshade from Target to get a match to an existing burlap shade. It’s my latest post and looks like the comment bot is linking it below :) You did a better job than me at simplifying directions!
Way to go! I love this idea and yours turned out amazing! I’ve been wanting to create my own lamp with a shade made of stained paint sticks, so this tutorial is perfect! Thanks for sharing!
What a great idea!! I have one outside in the garden just begging for me to do something with it..(other that hold a motion sensor light)! Now to figure out how to get it sparkly clean…ugh. but that would be the hardest part of this project. Great tutorial! Thanks for the inspiration!
*hugs*deb
That is an awesome water jug!! They ARE hard to find, but so worth it! And I love that you turned into a lamp, a useful item. I have a large vintage european water or wine jar and now I know what to do with it! Thank you! I’m quite addicted to unique glass jars or old mason jars ;).
Also, I LOVE that piece of artwork sitting on the table next to it. Is it an original or is it something I could buy a print of? Thanks so much for the lamp info!
Thanks! It’s an original, I got it at the same flea market as the water jug! It was my lucky day :-).
The lamp is gorgeous! I agree that its better to have a few large bold pieces rather than a lot of small things that look like clutter. I have an old green glass soda bottle that I plan on turning into a lamp or candle holder. I’m sure it will not compare to this lamp however you definitely inspired me to do some large lamps next. Cool idea, thank you!
Love this!
i have some bottles i am planning on turning into lamps and i was interested to see that you have jammed the cable into the neck of the bottle to get it into the fitting. my intention had been to get a glass bit for my drill and make a hole to run the cable inside the bottle but as i am also intending to fill the bottles with glass beads and/or coloured sand i am a little unsure about the possibility of heat build-up due to the cable having the filling packed around it. maybe it’ll be easier to have the cable on the outside of the bottle, especially since it would be obscured by the filling in any case. but have you tried any bottle lamps with the cable inside and filled? or do you know whether i have reason to be concerned about the heat risk or not? any knowledge or experience you have on this subject would be of value. thanks.
I thought I might try using a solar light and marbles or rocks for weight
“It was easy and no one died.” LOL I didn’t realize it was so easy. I think these could be great gift ideas, especially some boozy bottles for those with man caves n’ such.
Thanks for showing us how it’s done.
xo
I inherited a few antique hurricane lamps from my grandparents. I am thinking of converting them into electric lamps….but without compromising the lamps. This looks like a great way to do it. I am looking forward to this project.
Where did you get the glass jug? I love it!
I pinned this when you first posted it and today, two years later, I finally did it! So happy with my new bottle lamp, thanks so much for the idea + instructions!! :)
I to want to have a unique lamp that no one Else has, so I have also been looking, very impatient person, I want Instant gradufaction as well, so in looking in all my kitchen cabinets, I came across an Old Wavy Glass Cookie jar that is OlD but heavy and very unique, So I took it to my Local Glass cutting shop and asked if they could drill a Dime size hole in back of Glass at bottom THEY SAID YES, but if it cracks it is not their fault . Have to take in consideration that it could happen, SO I said YES agree, so excited to get glass back to make my own Lamp from, Look forward to showing everyone soon *
I want to use corks but do not know how to drill a hole inside for the wire. Any suggestions ?
This lamp is amazing! I am absolutely smitten with it! I have seen the big glass lamps before (for LOTS more than my budget can afford! HA!) But I have never seen a BLUE one! I think I have lamp envy now! I am going to have to look into this because I think I have caught the blue-jug-lamp-bug now and I don’t think I can shake it out of my head!!! Awesome idea! Pinning and will also pin to other boards :)
~Morgan (mypeartreehome.com)
Hoping you can help. Inspired by your post, I was hoping to make a DIY lamp too. I have a very similar water jug to yours, only mine is clear. I lugged it to a mom-and-pop hardware store and a Home Depot today, and the readymade kits in both places had those rubber pieces that were just too small for the mouth of my jug. They would have fallen straight through. The mom-and-pop shop’s owner tried a few creative solutions but couldn’t find anything to fit the mouth exactly. Did you have this problem? If not, any suggestions on how to figure it out? Thanks!