
This Post May Contain Affiliate Links. Please Read Our Disclosure Policy here

Every now and then, I get a little crafty. And when the urge strikes, nothing will stop me. Combining my crafty urge with my green obsession and a little spring fever, this past weekend I decided to try to make a moss topiary. That is a fancy way of saying I was going to glue moss to a Styrofoam ball. Yes, I did say glue. I knew it was risky but I like to live dangerously once in awhile.
I love having greenery around the house, and I figured that having a moss topiary would be a great way to bring some green inside.
Green plants in my care can (and will) die. The moss I used is already dead, or “preserved.” I always see moss balls in shops and love how pretty they can be so I finally decided I must have one of my own.
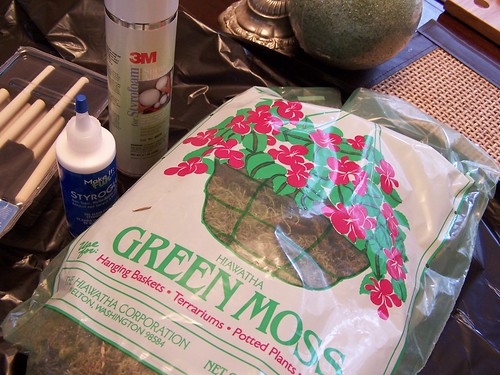
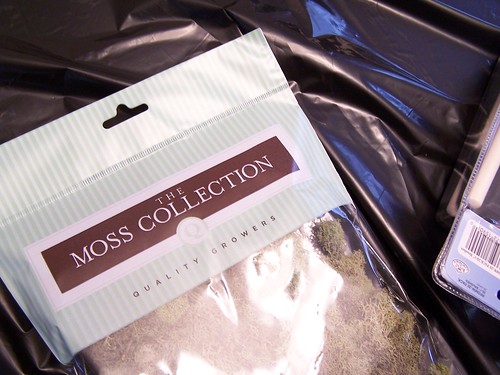
Being that I have never made anything like this before, it was all an experiment (so be kind, don’t laugh). I bought a three of bags of different types of moss — two bags of different colored reindeer moss and then a big economy bag of just regular old moss. I was so glad I bought the different types because I ended up using all of them. I loved all the different varieties, including the sticks in some of it!
At first I was a little worried, as my moss topiary looked a little like a toupee (is that how you spell it?) or a bad wig. But I stuck with it and once I got the moss glued all the way around, it looked alright. So many pretty colors and textures!
Upon reflection, my photos look a bit like I have a big hunk of broccoli in an urn. In real life, they don’t look as much like a vegetable. Just to be safe though, I would think twice about having one on your kitchen counter.

I made a few different balls, one for our living room, one that is in our bathroom and a few little ones to tuck in a bowl on some bookshelves. Sometime I might buy some long sticks to make them look like little topiary trees, but for now, they are just round balls. I am kind of liking them that way, a little less fussy.

Want to make your own? It is easy!
Supplies:
A variety of preserved real moss (you can find it at a craft store)
Styrofoam glue (I used both spray glue and regular glue)
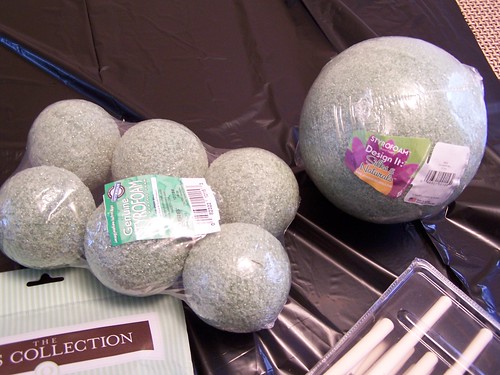
Styrofoam balls (get green ones if you can find them, it makes covering the Styrofoam a little easier)
I bought a foam brush for the glue, but I only used it once so you could pass on this.
A large plastic bag to do your craft on
How to:
Spread out your plastic bag on a table. This will be messy.
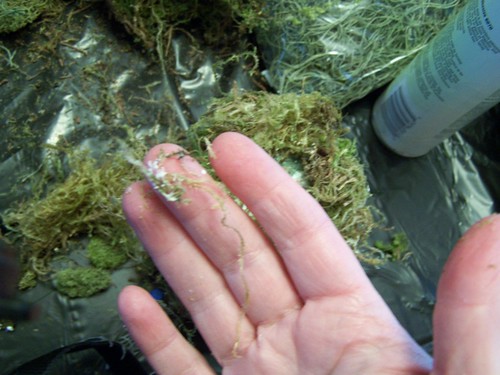
Apply glue to small sections of the ball, adding bits and pieces of moss as you go. I started with the spray glue and if I needed a little more sticky, I would dab on the regular glue. On the bigger ones I made, I used mostly the inexpensive type of moss and filled in with the reindeer moss to give it more variety in texture and color, just for fun. On the little ones I used all one kind of moss.
Remove leftover supplies from the table, carefully fold up your plastic bag with all the random bits of of moss, and throw away the bag. No mess!
After I made these, I remembered a great post on making Moss Balls from Living with Lindsay in which she suggested using straight pins to pin the moss on the ball, thus saving your fingers from the glued on moss. Genius, I say! Should have followed her instructions and tried the pins! Next time! I’m still finding bits of moss stuck to my fingers.
Tomorrow: Kicking off the first of a few upcoming spring giveaways!
this post shared for Rhoda‘s Spring Fluffing party, Works for Me Wednesday, and I am Blissfully Domestic
52 Comments
Trackbacks/Pingbacks
- The Year in Review: 2009 DIY - [...] I made my first ever moss ball topiary. [...]
Submit a Comment


I love it! You clever girl!!
Happy St Paddy’s Day, Melissa!
sandys inspiring blog post..St. Paddy’s Connection!
What a great idea! I will definitely use the straight pins. Thanks for sharing.
Carries inspiring blog post..Transform your bedroom into a cozy retreat
These look great. I love the variety! I noticed yesterday that my dollar tree had two different kinds of moss, so that’s where I would go first. This could even be a dollar store craft!
songbirdtiffs inspiring blog post..You Can Never Hold Back Spring (Tom Waits)
How cute are those???
And no need to water! perfect!
Dana (The Homesteading Housewife)s inspiring blog post..Shamrock Shakes!
They look so great, Melissa! I love how you used all different kinds of moss. I never would have thought to do that, but it does give it a very natural look.
I hear ya on the glue. ;) I originally stared mine by using spray adhesive on the entire ball first, which was just stupid. Live and learn!
living with lindsays inspiring blog post..DIY Mottled Egg Spring Wreath
Oh my, your topiaries are a great way to bring your fav color into the house! Great idea! When you are ready for a change-up, I wonder what they would look like with a small branch/stick inserted so they look like a “tree topiary” and then place them in a window box with ivy, primrose or other sweet green things at their feet and dangling over the edge of the window box?
Thanks for sharing this lovely springy idea!
Happy St. Pat’s day!
Debbykay
Debbykays inspiring blog post..Home Alone
This is a wonderful idea and it looks beautiful all finished.
love it.
Robin Rane’
All Things Heart and Home
Robin Rane’ ~ All Things Heart & Homes inspiring blog post..~Waiting on Ellie to come home~
Oh, for the not so crafy, this looks marvelous, Dear One! Yes, I agree about the pins. I made a couple of topiaries to sit on my mantle, but used the faux vines. I attached them with hair pins! Boy did it ever save my little dainty fingers! :)
Be a sweeie,
Shelia :) That urn is gorgeous
Shelias inspiring blog post..A Guest and a Bathroom To Be Remembered
“Green plants in my care can (and will) die.”
You, too? My husband knows not to bring anything that doesn’t breathe oxygen in the house because I will kill it. I don’t mean to. They just sort of…expire. : )
Heathahlees inspiring blog post..While I’m Down and Out
Oh, and your topiaries look beautiful, by the way! : )
Heathahlees inspiring blog post..While I’m Down and Out
I love all the different textures. Great job!!
Kaseys inspiring blog post..Treasures
It’s always fun to try your hand at something new and crafty. And I love using green to decorate my home – especially since spring is right around the corner!
Kristens inspiring blog post..Simple Savings: The Farmer’s Market
Oh wouldn’t t-pins work great for pinning on the moss? These mossy creations are everywhere these days. Just saw one at Manuela’s… It is always fun to create. You made me laugh with your comment about glue being dangerous. Ha! It often is here, too.
Vees inspiring blog post..I Feel Irish
Aren’t green mossy hands good luck on St. Patrick’s Day? ; )
You’re very crafty. We’re doing spring decorating today. It’s time…
kirwins inspiring blog post..Encouraging them to play with their food
That looks terrific Melissa!
I may have to try to make some – I like how they are spring like and yet don’t need to be watered etc….
Mrs.Rabes inspiring blog post..Prayer Request
I really like the containers you used. You’ve inspired me to be on the looks out for sweet vessels so I can make a similar topiary –
Thanks
Top of the morning to ya =]
teresas inspiring blog post..Old Fashioned Homebrew….
This might be just what I need to bring a little green into my home, Melissa! Thanks for sharing your wonderful ideas … you’re much more crafty than you give yourself credit for. ;)
xo,
Lynda
Lyndas inspiring blog post..:: Living the Simple Life ::
I love it, wonder if my dogs would leave it alone????
May just have to give it a try. Thanks for sharing the “How To’s”
Sheryls inspiring blog post..Healthier You Challenge
You did a wonderful job, those look great. This is one spring project that I haven’t tried yet, but it is on my list!
Kimm at Reinventeds inspiring blog post..Shabby Shelving
You did a wonderful job with the moss! I almost bought some a couple of days ago to do the same thing. I was a little worried about the mess I’d make! :-) I’m not a neat crafter!
I might have to try it now that I see you were able to do it without too much trouble.
Oh, St. Patrick’s Day is a great day for green, so if you still have some stuck to you, it’s fine! :-)
~Kim
Kim @ Forever Wherevers inspiring blog post..Tasty Tuesday Parade of Foods – Irish Celebration!
Yay! glad you shared your project. I think they look amazing- just as good as what you would find in those little boutiques. Your making me want to get my craft on!!!
Amanda-The Eck Lifes inspiring blog post..Another spray paint story
I think I’ve got to get on the moss train…good point about it being already dead. Ha!
the BLAH BLAH BLAHgers inspiring blog post..Tuesday Tool Talk & 250th BLAH BLAH BLAHG Post!
Hey I love this…I made these last week but I did not have the styrofoam forms so I used wadded up newspaper…It worked also if you cannot get to the store:) I love your ideas they keep me inspired!
Oh the fun of working with a glue gun and moss. But then I would always be poking myself with pins.
Love the variety of things you came up with, Melissa.
Becky K.s inspiring blog post..A Busy Week Serves as a Reminder
I love crafts! Plus it is more fun sometimes when you don’t know what you are doing because if it turns out badly you can have a good laugh and if it turns out well (like yours did) you can be really proud.
Happy St. Patty’s Day!
Taylor at Household Management 101s inspiring blog post..Mar 17, Top Ten Spring Cleaning Safety Tips
I love these, and have made several over the years. I just use hot glue! Yes, I have burned the skin off of my little fingers but it’s super fast. The topiaries look great, you just have to re-do them about every year or so to keep them looking their best. Yours are fabulous!
~Misti
Misti of Studio M Designss inspiring blog post..Hyped up for Spring: Decorating Ideas
I love it – I have an empty urn similar to yours that’s just begging for a moss ball. Thanks
I can not even express how I love your blog! I’m definitely trying this one as I was just lamenting the lack of greenery in my rooms.
Lisa @ The PWs inspiring blog post..Treat and ReTreat
How perfect for St. Patrick’s Day! I’ll be linking.
HI Melissa! Hey you and glue could have been a sticky situation! What a great project. And really this would be great for outside on a porch or by a front door. I love it!
Blessings,
Debbie
Debbies inspiring blog post..Hiding fabric!
Love it! What a great project.
Happy St. Paddy’s Day!
Lisa from celebrate CREATIVITYs inspiring blog post..Apronology
How cute is that???? Very!
Happy St.Patrick’s Day! _Everyone_ is a bit Irish, today. I’m 1/4. :-)
Aunt Amelia
“This is one race of people for whom psychoanalysis is of no use whatsoever.”
~~Sigmund Freud (speaking about the Irish) >,-)
Aunt Amelias inspiring blog post..Oh, it’s March 17th and it’s… :-)
Le Magnifique! Looks great!
Very nice! No watering or killing of houseplants involved, sounds good to me!!!
laurie millers inspiring blog post..Queen of Tarte
Great idea!
I have tears in my eyes from laughing as I read this post! They turned out great! Way to channel your inner crafting-diva!
I think you should name your moss balls. I think the one in your bathroom is Otis and the one in the family room is Nelson. I guess I meant to say that you should let me name your moss balls.
And if it makes you feel any better, I hot glued myself to the carpet TWICE while I was making this last round of felt pins. As a matter of fact, I believe it was while I was making yours.
K
Kimba @ A Soft Place to Lands inspiring blog post..Tufted Headboard: Part 2
How smart. Those things are expensive in the stores. Thanks so much for sharing the “how to’s”. laurie
You all are way too kind.
And Kimba, I love the names you picked out for them. Otis and Nelson are the perfect choice. I can’t say why, exactly, but you really captured their personalities.
GREAT idea!!! I love the simplicity of a topiary – so sculptural yet elegant. LOL about the glue on your fingers. That would be me – totally!
Give Mr. Winston a big hug and kiss and happy birthday wishes from all of us here!!! Wow! 14 and still looking mighty fine! LOVE you, Mr. Winston!!!!!
xx
Becky, Duhgall and Fiona
Sweet Cottage Dreamss inspiring blog post..Happy 21st Birthday, Mr. Doogie! Happy St. Patrick’s Day, too!!
That’s so adorable! I may have to make a pair of them for my fireplace!
Thanks!
Connie
Nice touch of creativity. I like it especially for darker areas of the home that may not get the sunlight necessary for a plant.
Gennaros inspiring blog post..9 Top Cities, 9 Top Irish Pubs
YAY, Melissa! You’re getting crafty, isn’t it fun?! You did good with the moss balls & really, Kimba even named them. How cute! :)
Thanks for joining the party!
Rhoda @ Southern Hospitalitys inspiring blog post..Hopping into Spring: The Spring Fluffing Party
And I was on the hunt to find one already made! I think your way is cheaper and it can be customized just to my liking too! Thanks for sharing!
Katie @ Clean & Classic Interiorss inspiring blog post..A Tisket, A Tasket, An Organizing Basket
Very craft of you Melissa~smile. It came out great! I made one too with sheet moss and used my trusty hot glue gun.
Manuela
The Pleasures of Homemakings inspiring blog post..Spring Fluffing – China Cabinet
Gorgeous, thanks for sharing.
Cece
Ceces inspiring blog post..Spring Fluffing Party Post….
Wow! I love these. What a great idea.
Jerris inspiring blog post..Lavender Cottage Jewelry Giveaway
what a great idea!! I have these same vases and have been wondering what to do with them. Thanks!
robyns inspiring blog post..New Items
You’ve never done anything like that before?!?!?! Why does that really surprise me? Well, you did a fabulous job. And you’ve inspired me. I have just the perfect urn that sits at the base of my fireplace. I’ve been wanting to add that certain something too it! Now, I know just the thing it needs:)
Melissa Lewis – Off The Walls inspiring blog post..Candice Olson’s Beautifully Textured Wallpaper
So very cute and inspiring! I picked up two styro-balls today and the moss and quickly did the project. Then I remembered decorators always talk about using “odd” numbers, so I looked around the house to see what else I could cover with the leftover moss to make a three-some. Guess what I used? A green apple! And it was oh, so easy. I don’t know how long it will last before I start to smell something funny, but it works for the short term!
Happy Friday!
PS If you have “Old Time Pottery” near you, you HAVE to go! My first time today and the selection and prices are AWESOME! :)
What a GREAT project!! I have made topiaries before but not moss ones! I have all the supplies and might go make one right now!! Great blog! I’ll definately be back! :)
Kristi
Kristis inspiring blog post..A Dreamy Nursery……
Instead of glue, I have used hairpins (you know the kind that have the rounded end). Beautiful topiary!
~Heather