
This Post May Contain Affiliate Links. Please Read Our Disclosure Policy here
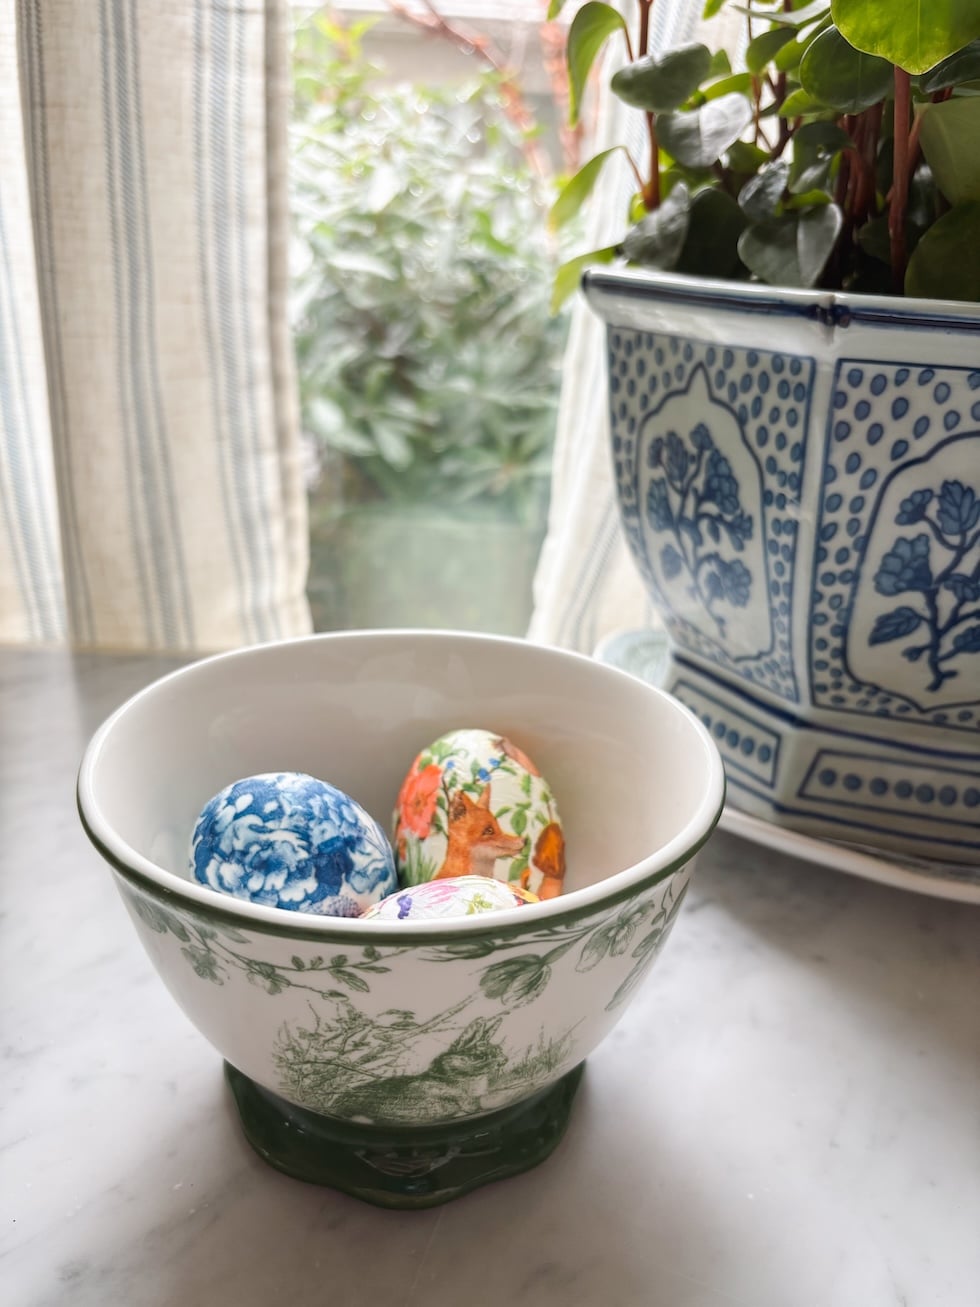
I have a fun little Easter craft for you today!
I actually picked up these supplies two years ago with every intention of making them…and my daughter Courtney and I finally did it this week.
If you have Prime, you should still have time to get the supplies before Easter. If not, save this for next year (or be like me and order everything way in advance so you’re ready when the mood strikes!).
Also, quick disclaimer: I’m not a DIY professional. :) But I think these turned out very cute!
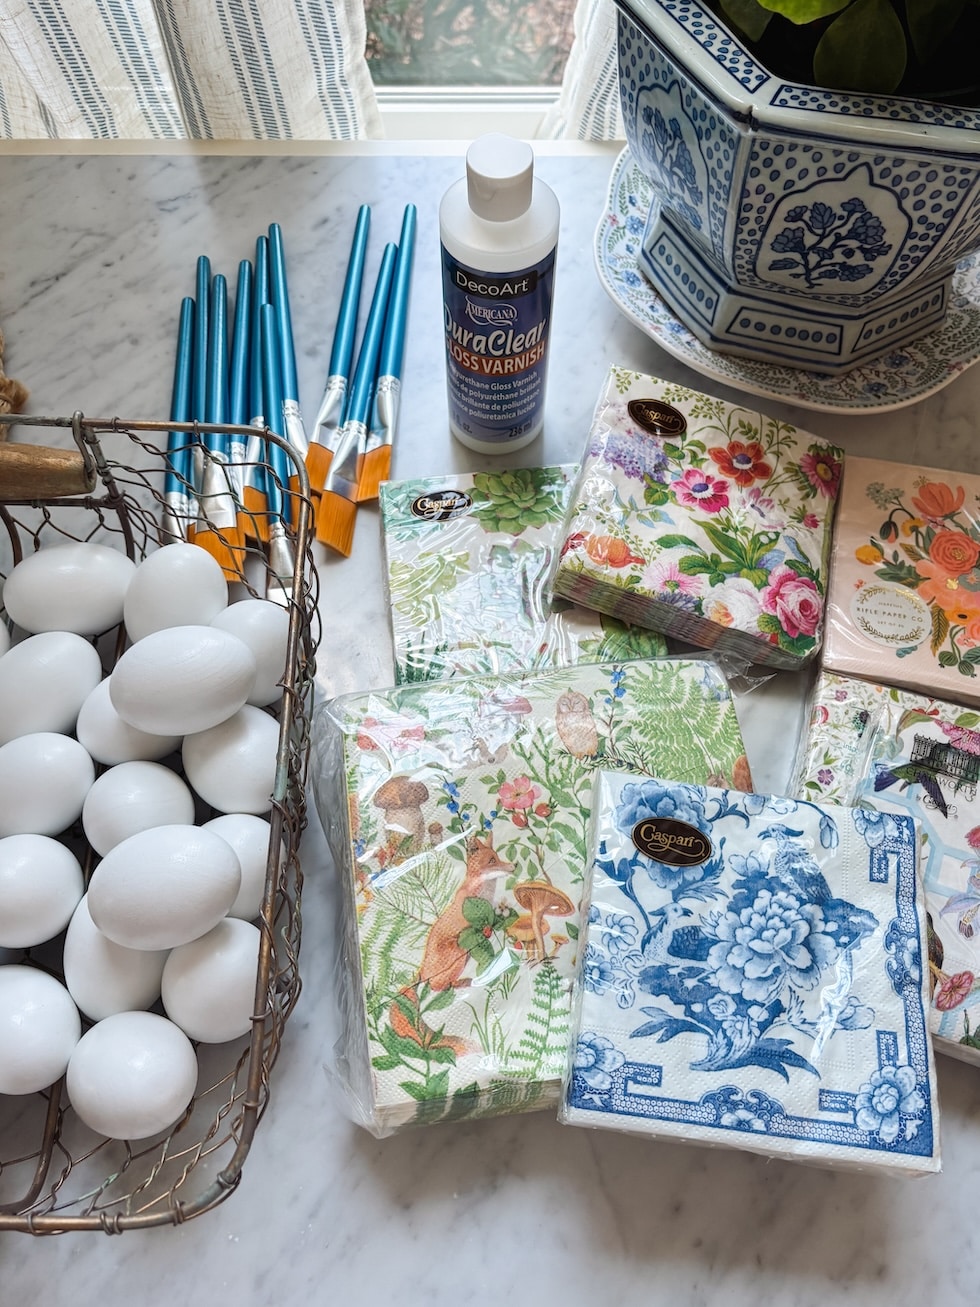
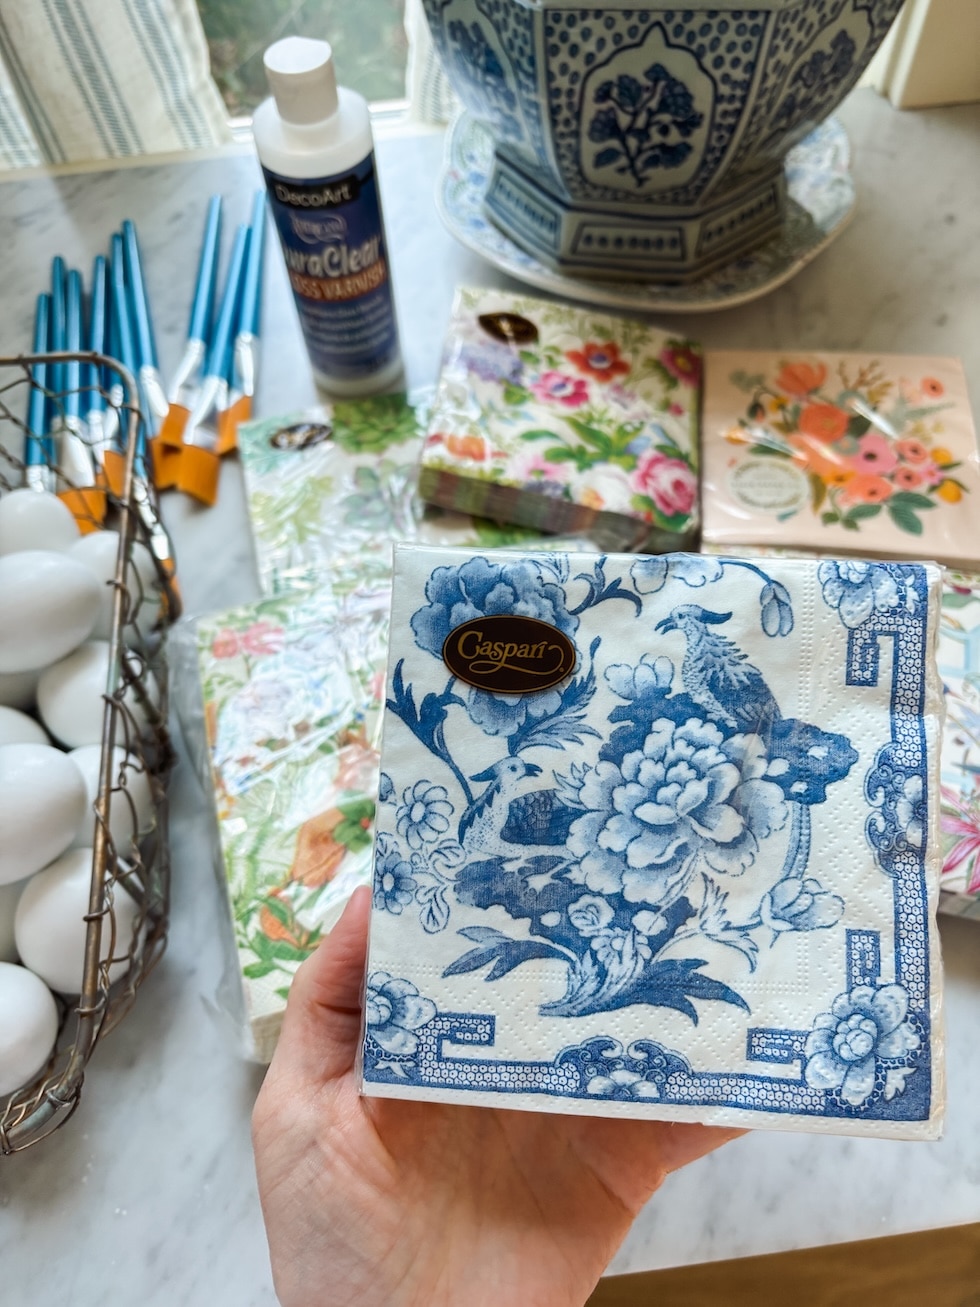
Here’s what we used:
Forest Animal Cocktail Napkins
Floral Cocktail Napkins (similar)
I rounded up everything I used and a few extras here
How we did it:
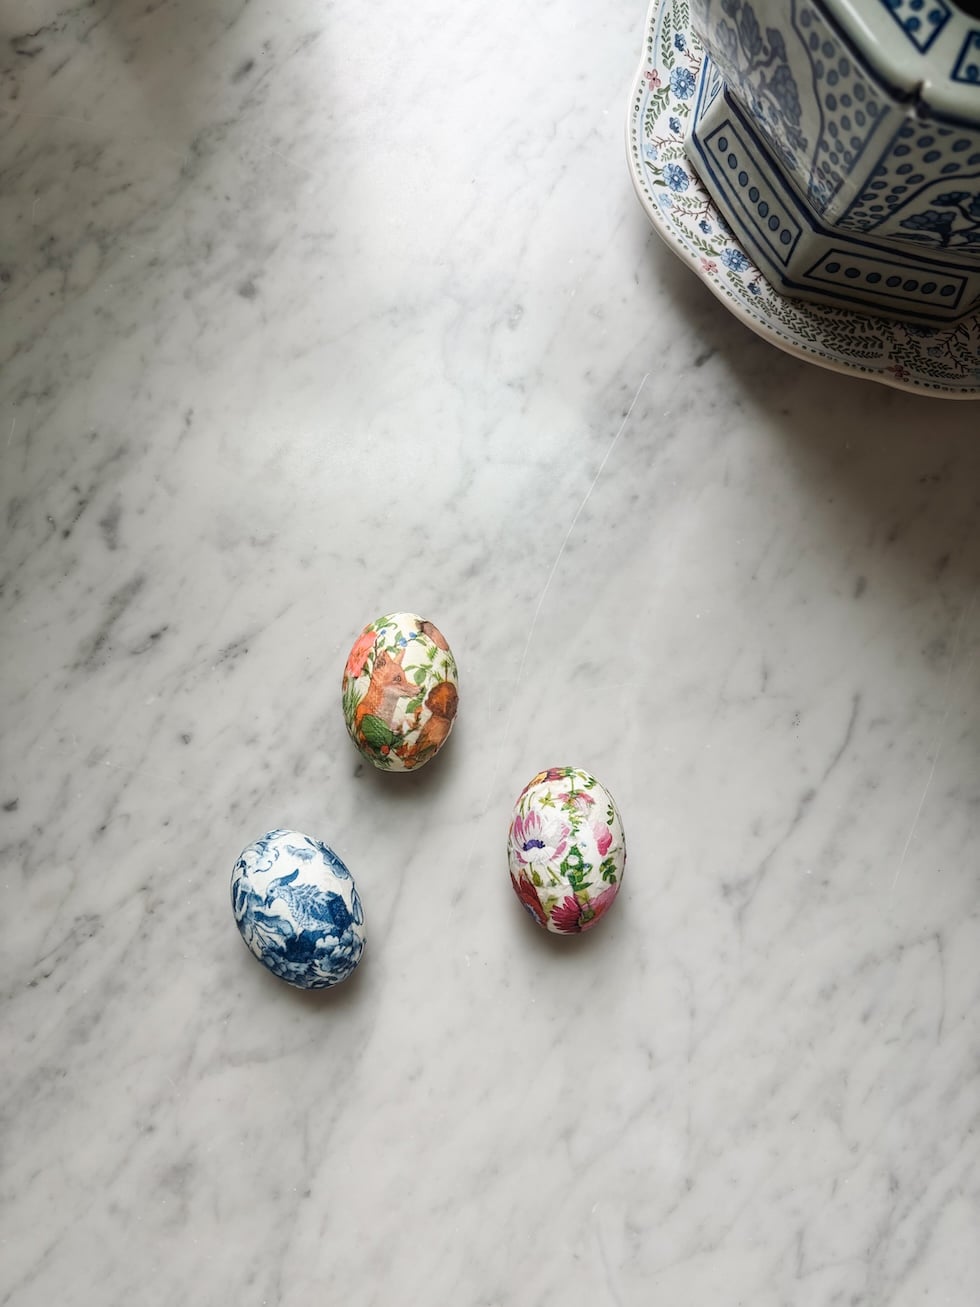
- Separate the napkins so you’re only using the top printed layer
- Tear (don’t cut) the napkins into smaller pieces—torn edges blend much more naturally.
- Brush a thin layer of varnish onto the egg.
- Gently place a napkin piece on top, then brush another thin layer of varnish over it to smooth it out.
- Repeat, overlapping pieces slightly, until the egg is covered.
A few helpful tips I learned along the way:
- Less varnish is better—too much can make the paper wrinkle.
- Use a light touch with your brush so the napkin doesn’t tear.
- If wrinkles happen, don’t worry—they actually add to the charm.
- Let them dry on parchment paper (we put ours on a plate and ours stuck a little)
- Smaller pieces are easier to work with around curves.
- I didn’t wear gloves and ended up with varnish on my fingers :) next time I would wear gloves or just keep a damp cloth nearby for easy cleanup.
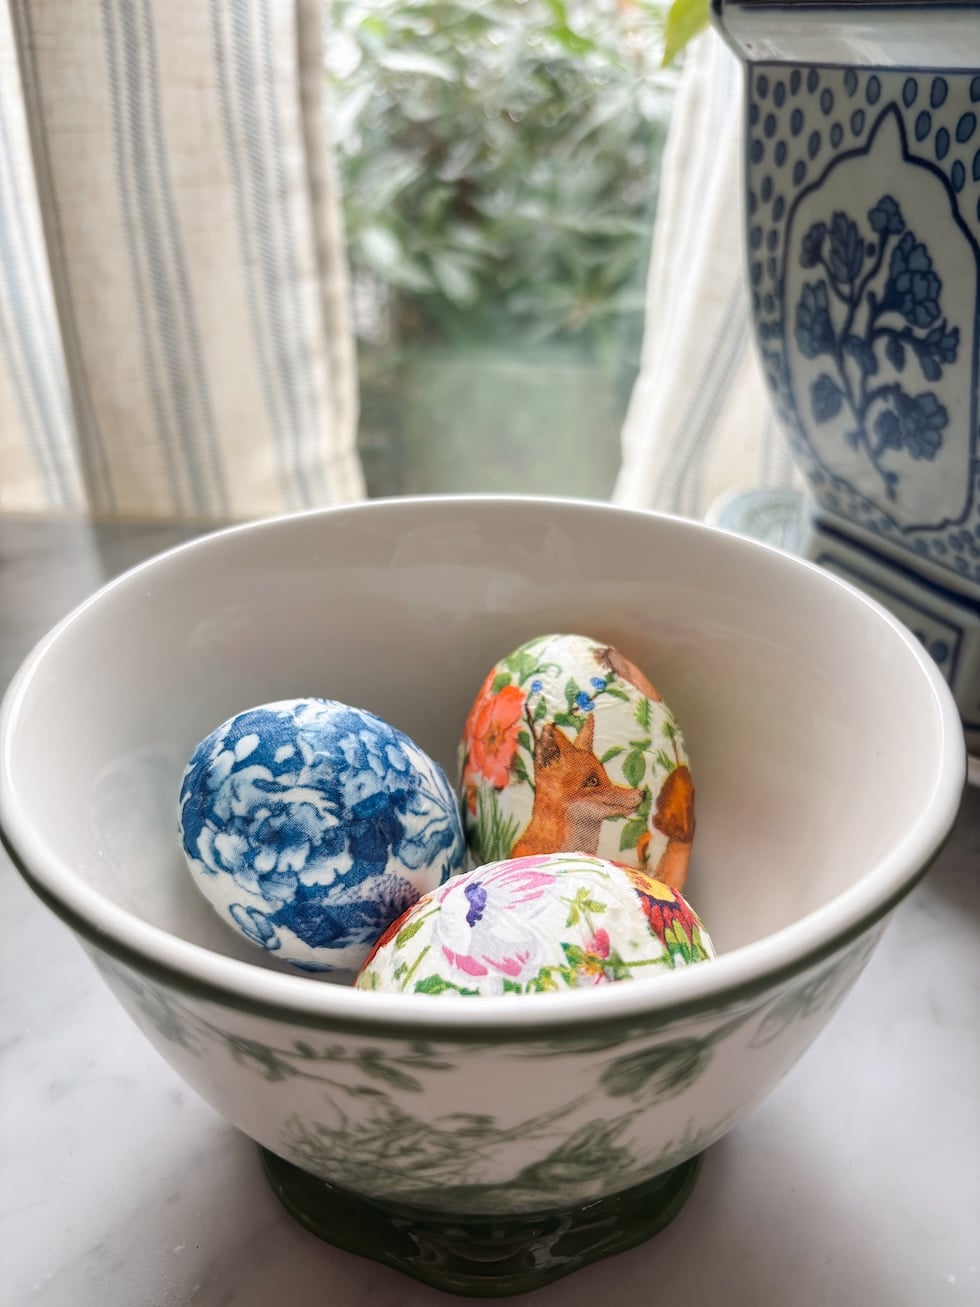
Ideas for using them:
- Display in a bowl
- Scatter along a table or centerpiece
- Use as place settings
- Tuck into baskets or spring vignettes
This would also be such a fun craft to set out for guests…everything can be prepped ahead and everyone can make their own!
Let me know if you try this! Tag me @theinspiredroom if you do so I can see.
2 Comments
Submit a Comment


I see you link is for luncheon/dinner napkin but does cocktail size work/enought for an egg?
Yes those are perfect!