
Hello! It’s Cassie here today for my monthly guest post. If you have ever searched “play kitchen” on Pinterest, you have probably seen an image of an Ikea Duktig kitchen hack. Ikea’s simple play kitchen is easy to assemble, affordable, and fun to customize, which makes it a popular “Ikea hack.”
With my daughter Evie’s birthday coming up this month, I knew I wanted to tackle this project in time to give it to her as a gift. I looked at a few examples of what others had done, but mostly I thought about what my own dream kitchen would look like. I wanted her’s to somewhat coordinate with our house, but I also wanted it to be practical, easy to clean, and fun for her to play with. The final product turned out better then I expected and I had the best time working on it! It took me a few days, but only because I waited to put it together after painting it.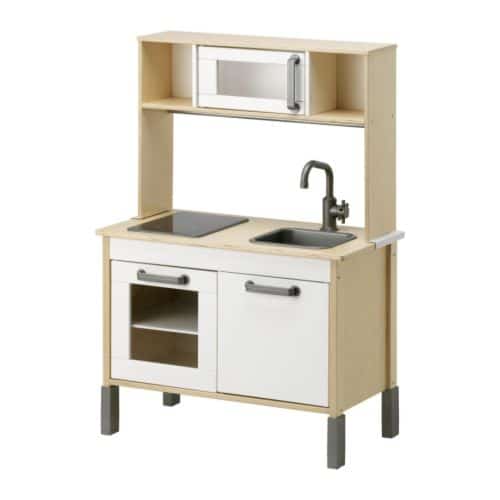 Ikea “Duktig” kitchen, as it originally comes
Here are the main changes I made to the original kitchen:
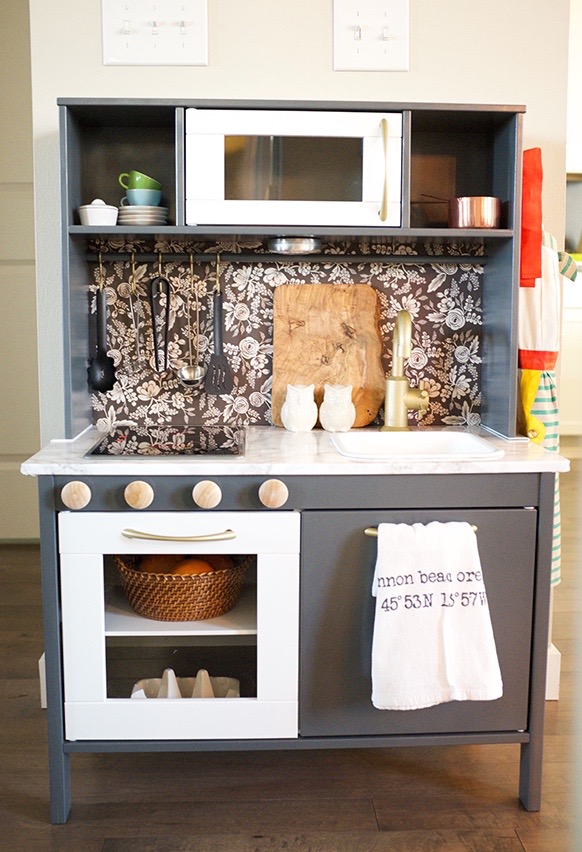
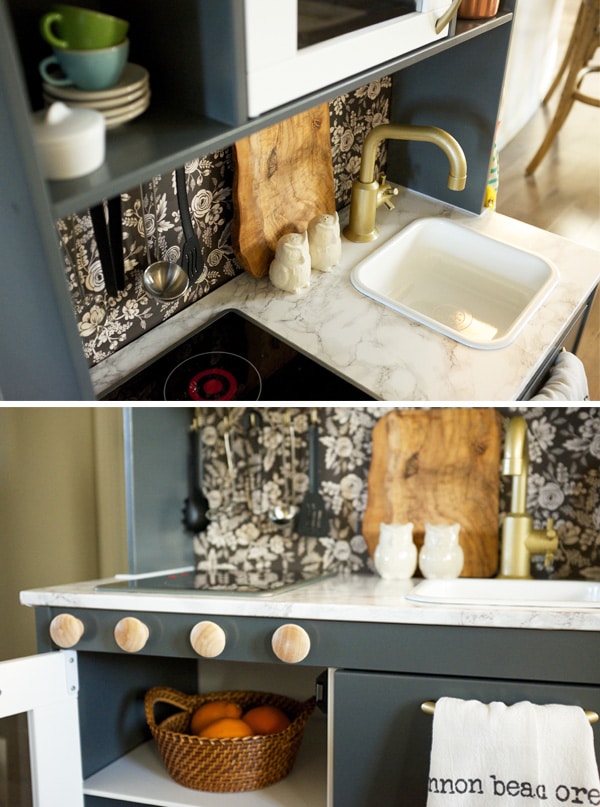
- Painted all wooden pieces grey with the exception of the oven and microwave doors, which I left white. I used a high gloss spray paint.
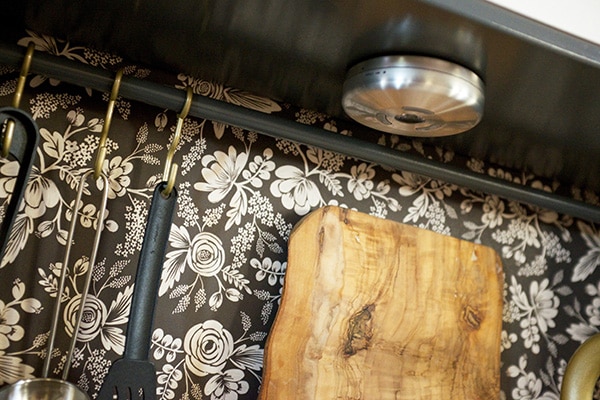
- Used contact paper (I chose one that looked like marble like this) to cover the counter top.
- Painted the kitchen sink white with high gloss spray paint. I also glued the sink in place.
- Purchased new hardware for doors.
- Spray painted faucet and new hardware with matching gold paint.
- Added wooden knobs above oven to imitate real oven knobs.
- Added a battery-powered LED light for under cabinet lighting.
- Used a 3M hook to hang a child’s apron on the side of the kitchen.
- Added a paper-covered foam poster board to the back to imitate a backsplash.
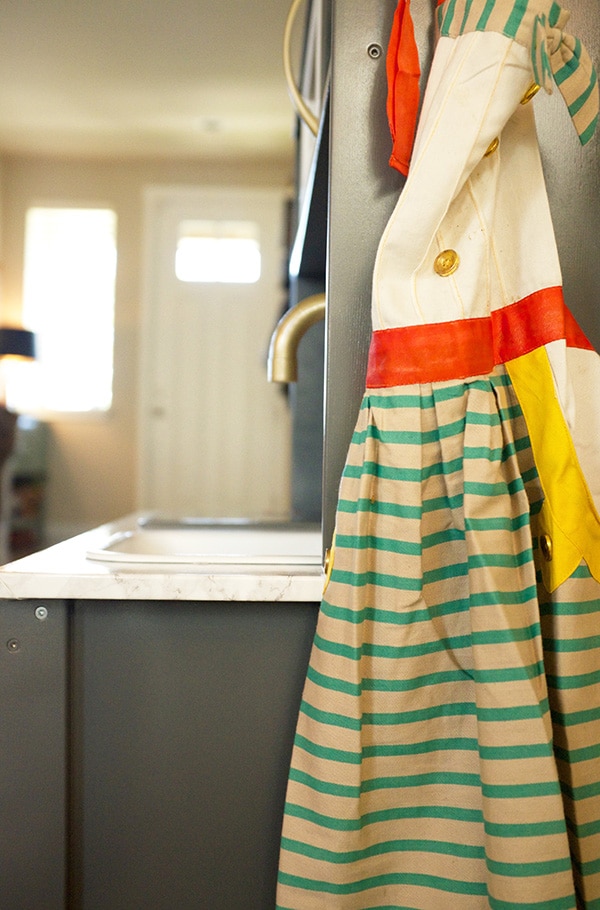
Apron is from Anthropologie, although it is no longer available.
With the holidays coming up, this is a super doable gift idea for children. Some play kitchens can be on the spendy side, but as I mentioned above, this one is pretty reasonably priced. Also, most of what I purchased for this was spray paint, and that happens to run fairly cheap.
If you are ever interested in doing this project, or a similar project, here are my biggest tips:
- Assemble top and bottom pieces separate and without doors attached, then paint.
- Paint doors before attaching.
- If using contact paper, apply to countertop and cut out the holes for oven and sink later.
- I used basic hot glue to glue sink in place and to attach the poster board to the back (we will have to see how that holds up!)
- Find a way to keep faucet upright when painting- I just stuck mind in play-dough (since we have an abundance of that in our house) to keep it upright.
- Read the back of the paint can. Some paint takes a day or two to really cure. Sometimes they recommend doing multiple light coats close together or waiting 24 hours to do another coat.
Here are the sources for some of what I used for this mini “renovation:”
- Ikea Duktig Kitchen
- Ikea Duktig Utensils
- Cabinet and sink spray paint: Rust-Oleum Painter’s Touch 2x in High Gloss Dark Grey and High Gloss White, from Home Depot.
- Hardware and faucet spray paint:Rust-Oleum All Surface Metallic Gold, from Home Depot.
- Marble contact paper.
- Backsplash: Rifle Paper co. wrapping paper attached to foam poster board (from Target).
Note: I loved styling this mini-kitchen for fun, but I don’t plan to let my two-year-old use ceramic owl salt and pepper shakers or breakable dishes. As pretty as they look, they aren’t always practical. She has lots of plastic and wooden fruits, veggies, and dishes to play with once we give her the kitchen. They just weren’t as pretty in the photos as the breakable things. (wink wink)

I hope this project inspires you all as you begin your holiday shopping or if you are tempted to try a simple Ikea hack.
Until next month,

See more of Cassie’s posts below:


Suuuuper cute.
That kitchen!! I die. It doesn’t even look like the same one! You did a fabulous job. I would have loved that when I was a kid. Let’s be honest, I would love it even now! ;) Evie is a lucky girl!
Wow, that’s incredible! May be my favorite IKEA hack I have seen yet! Makes me wish I had a little girl who wanted a toy kitchen. My boys only want Bat Caves and Lego tables.
Oh wow – it looks gorgeous!! I love the colours!! That is one classy play kitchen. I kinda wish my real kitchen looked like that. ;)
It came out so beautiful! Years ago Santa’s elves (aka mom & dad) built one for my daughters and it’s in need of a mini makeover since it has taken a beating over the years and they still use it. Thank you for the inspiration.
I just came across this as I’m getting ready to do this myself! Your kitchen turned out beautiful! Did you sand and prime the wood before spray painting? Any tips on applying the contact paper smoothly and putting it around the corners?
I love it! It is so pretty! I want to do one for my children but i have a question… Do you sand the furniture? Or direct the paint? Any primer?….. Sorry for my english….
Love it! We are in process of moving to a new house. This is going to be my next project after we settle in.
how did you apply the marble paper evenly?